Well, well, welt.
You all asked for it, so here it is! A tutorial on how to create a welt pocket.
Too often, people are intimidated by this technique, but if you can sew a straight line (and pivot at a corner) and fold fabric, you can make a welt pocket with ease.
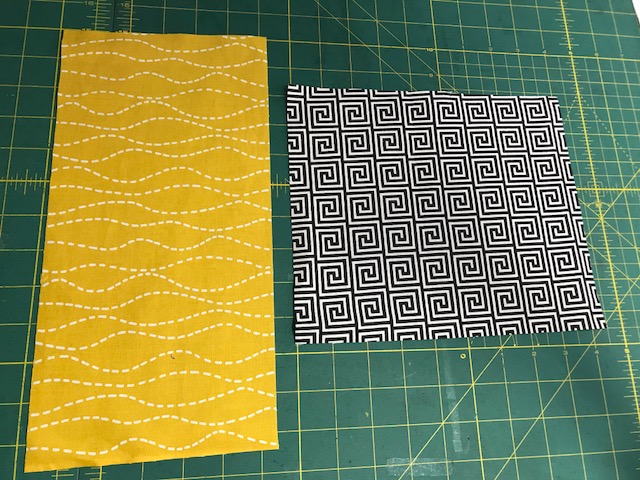
Let’s start with the fabric. For most fabrics, I don’t use interfacing. I find that custom printed cotton Lycra is stable enough on its own, as are many woven apparel fabrics. For thin woven or floppy knit, you will want to use a stabilizer like Pellon Ultra Lightweight fusible interfacing (affiliate link).
Many patterns that call for a welt pocket or welt opening will have a pattern piece for you, but if you’re trying to create one from scratch, here are some tips:
Start with how deep and wide you want the pocket to be. I would say 5” is a good opening size, but depth can vary.
Here are the dimensions of the welt pocket piece I will be using for this tutorial, broken down into each piece.
.jpg)
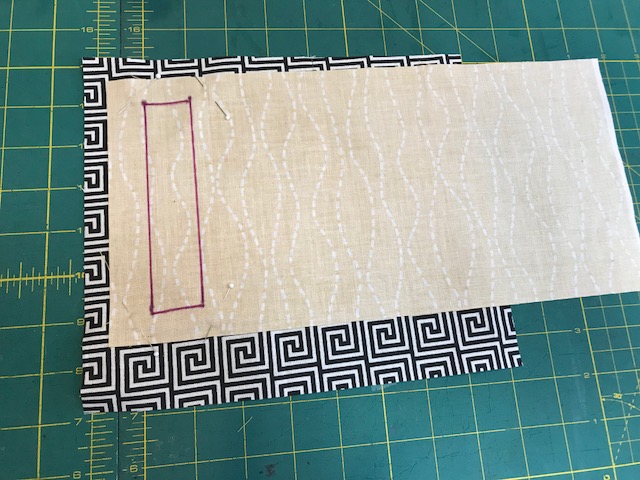
For this tutorial, the opening will be 5” by 1” and the pocket will be 4" deep (starting from the top of the pocket opening). The welt piece is 6” by 13". I am using a half inch all around the actual pocket dimensions, which is a nice amount to work with in the final step.
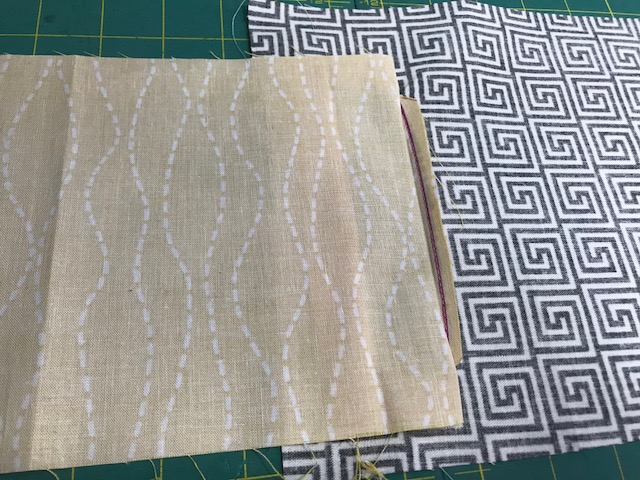
Make sure to iron your pieces to start with; it will make assembly much easier.
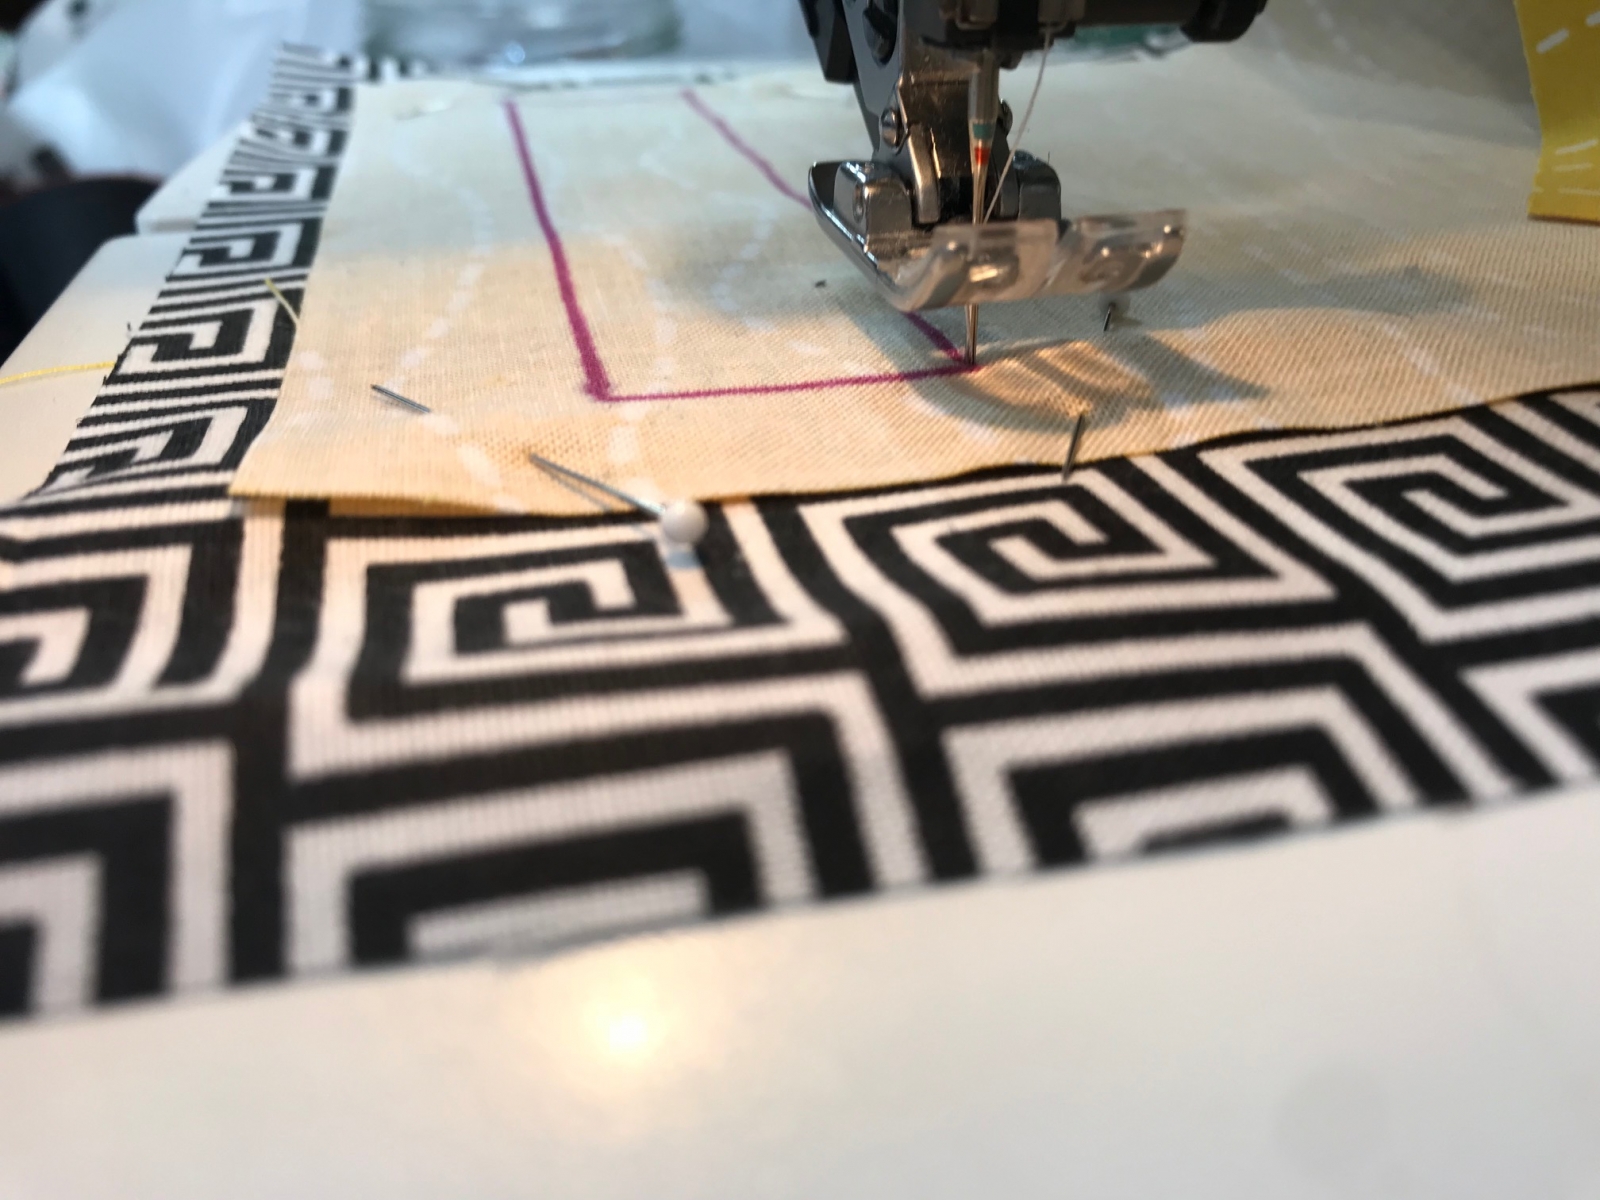
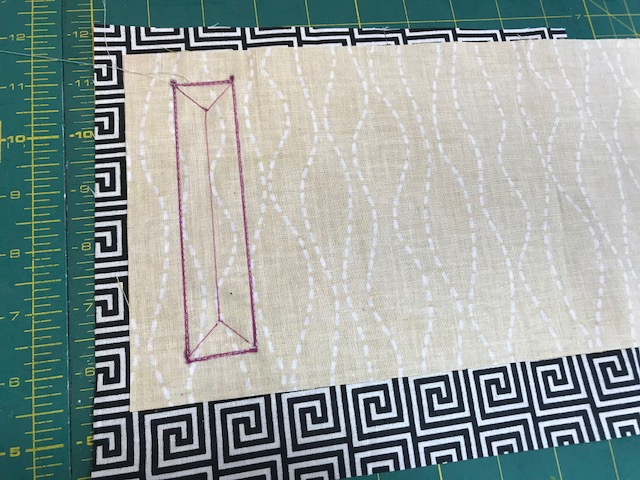
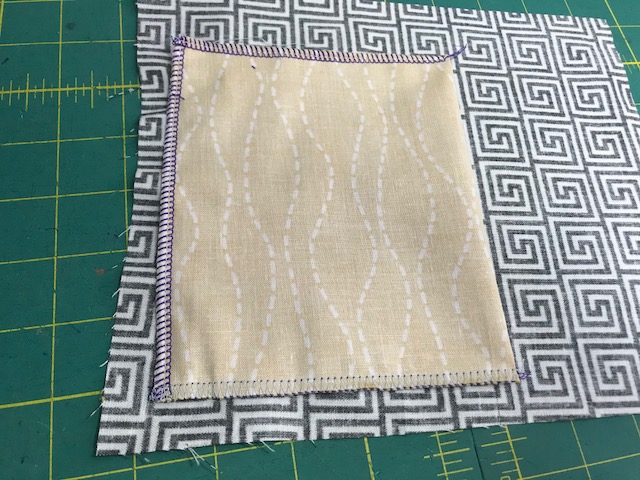
Draw the hand opening on the wrong side of your welt piece. (I used a Sharpie to draw my lines for maximum visibility; you will want to make sure to use water soluble ink or tailors chalk.) Here, I have made a rectangle 5” by 1”. I have also marked where I want the opening to be on my “garment” (could also be a bag lining or something else) henceforth referred to as the main fabric. Lay the welt piece face down on the main fabric. Pin in place. Sew around the opening with a straight stitch, making sure to leave the needle down and lift the presser foot so that you can pivot on the corners and keep them sharp.

To create the opening, first draw a line down the center of the rectangle stopping just short of the ends. At either end, draw lines from the corners in to the center line. Cut along the center line and out along each diagonal line, coming as close to, but not clipping through, your stitches.

Trim the flaps down to 1/4”. For a more professional look, you can grade the seam by trimming the main fabric's raw edge another 1/8”.
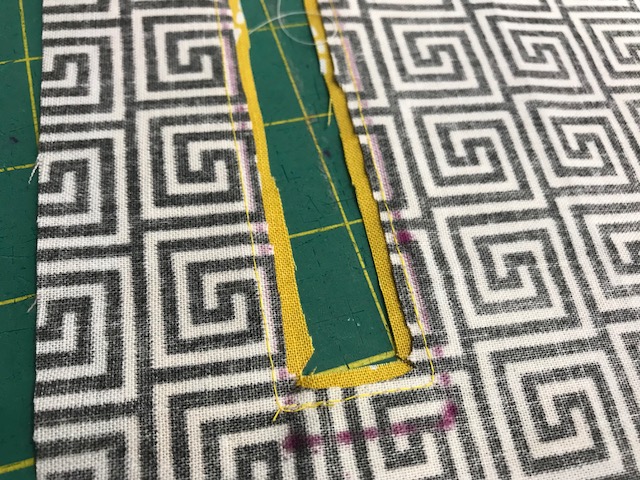
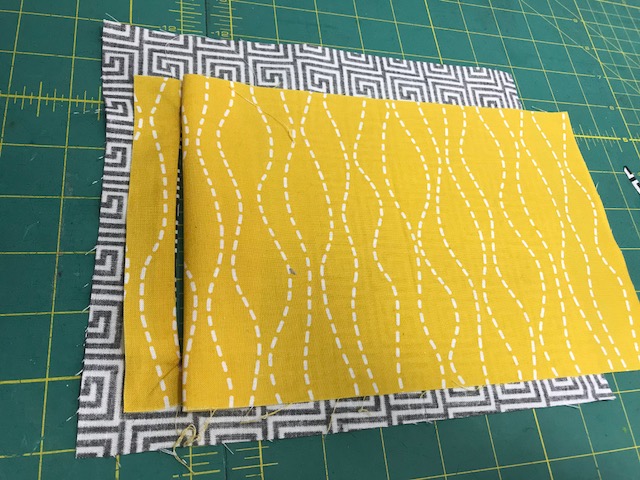
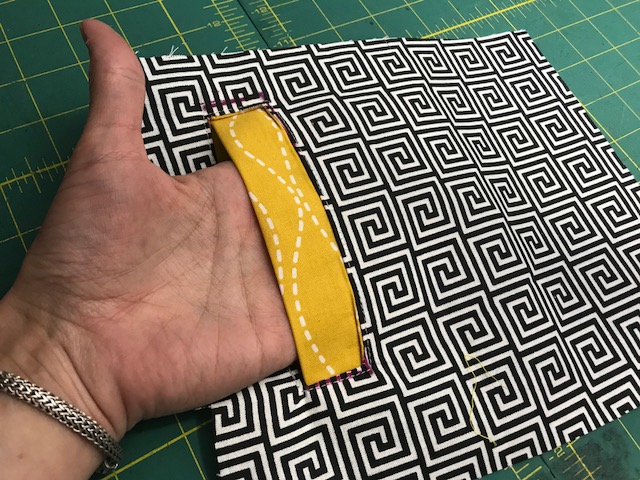
The next step is probably the most frustrating, but it’s not difficult. All of the welt fabric has to be fed through that opening to the wrong side of the main fabric. Take your time; the shorter sides will be stubborn. I recommend (carefully) using an iron to press each side as you coax it into position. It may take some finessing, but make sure the corners are as square as possible with no bunching. If you have a lot of bunching, go back and make sure that you have cut as close as possible into the corners. Once all of the welt fabric is through, press well.
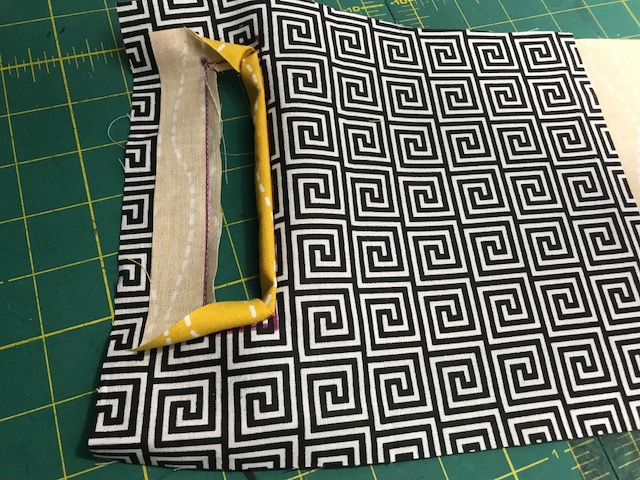
Now comes the origami. Fold the welt over into itself, right sizes together, then fold the welt fabric back, creating a folded edge that meets the top of the pocket opening. Pin the fabric in place.
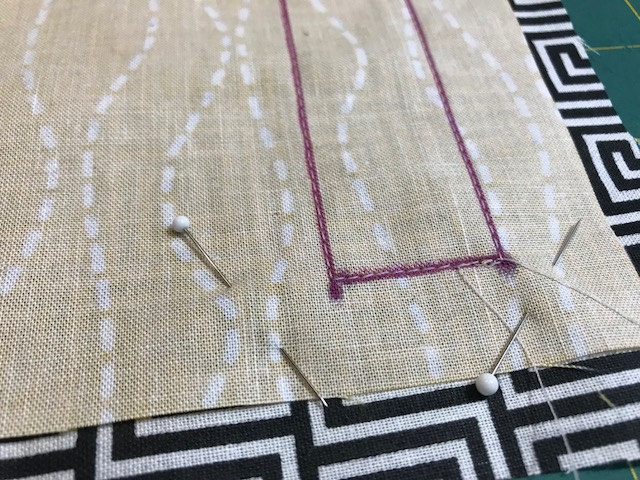
Turn the whole piece right side up and sew around the opening with a straight stitch, again being careful to pivot at the corners. This, and ironing, are the keys to a professional finish.
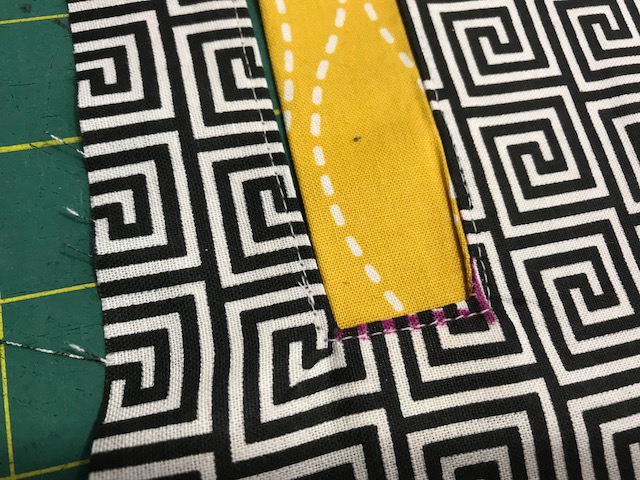
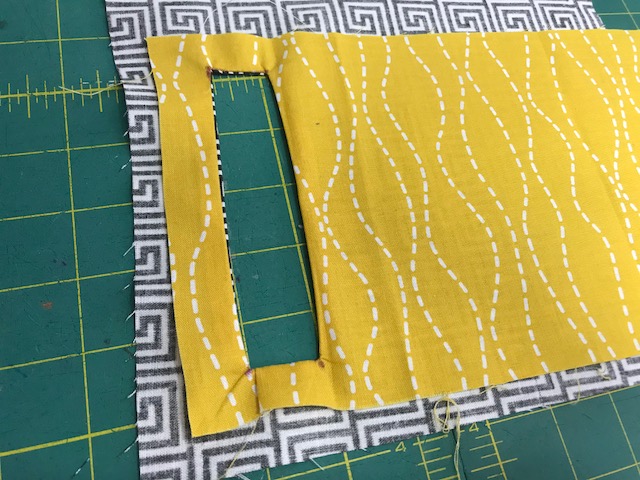
Once the welt is secured, you’re almost home. Turn the whole piece to the wrong side again and fold the pocket in half to once more align the all of the raw edges. Serge or sew the top and sides closed. Press again
 .
. 
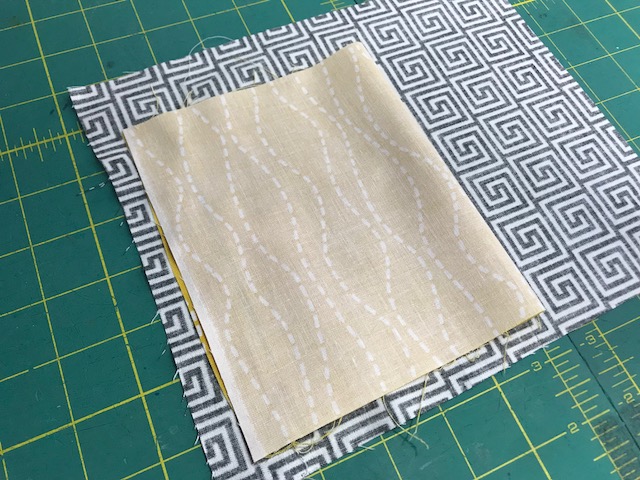
And now you’re done! It’s one of the techniques that takes longer to explain than it does to do. Remember: always practice on scraps with the same weight as your project.
Keep this tutorial bookmarked; I have some ideas kicking around for welt pockets in future patterns :)
Happy sewing,
Katie and the DBD Crew