Flat out flat
Color blocked garments are really in right now. Whether it's the myriad of Euro patterns or the catalogue from DBD (or other fantastic designers like Elliedactyl), they are wonderful for using scraps, making good use of coordinates, and they're just plain fun.
The downside is, of course, that the nature of colorblocking means many seams on the inside of the shirt.
For many people, this is a deal breaker. Whether it's an issue of sensory aversion, sensitive skin, or just plain preference.
There are many ways that people get around this. Some people make sure they top stitch the seam flat and others use french seams. One way that is not often seen but is very easy is flatlocking. Flatlocking is very common in athletic and swimwear wear since it minimizes chafing.
Unlike coversitiching, you don't *need* special machine for flatlocking if you have a serger. Sure you could spend $4k on an industrial flatlock mahcine, but by changing a few settings on your serger, you can have seams that lie flat on the inside of the garment AND get a fun coverlock look on the front.
Start by increasing the seam allowance on your pattern. DBD patterns include a 1/4" seam allowance, but the ideal seam allowance for a flatlock seam is 5/8" so you will have to add 3/8” to the pieces along the seams. You know what? I used a 1/4” seam on my latest project and it was perfect.
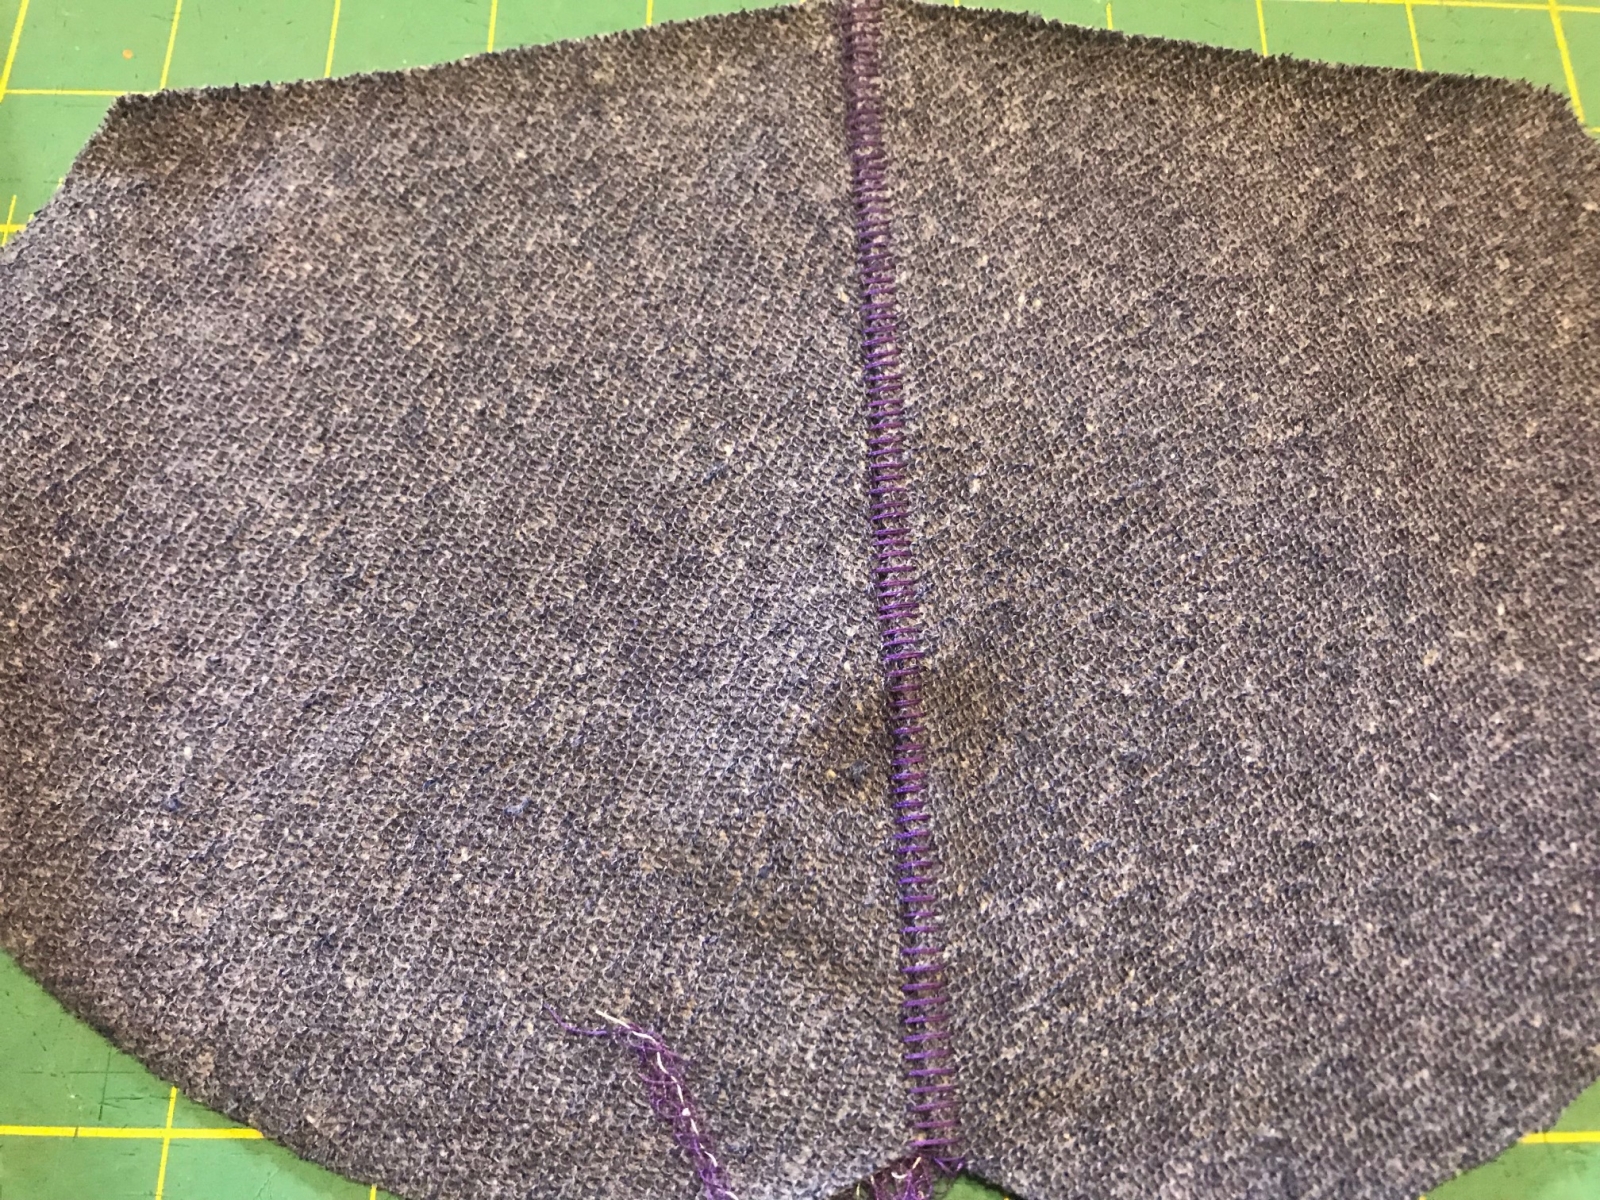
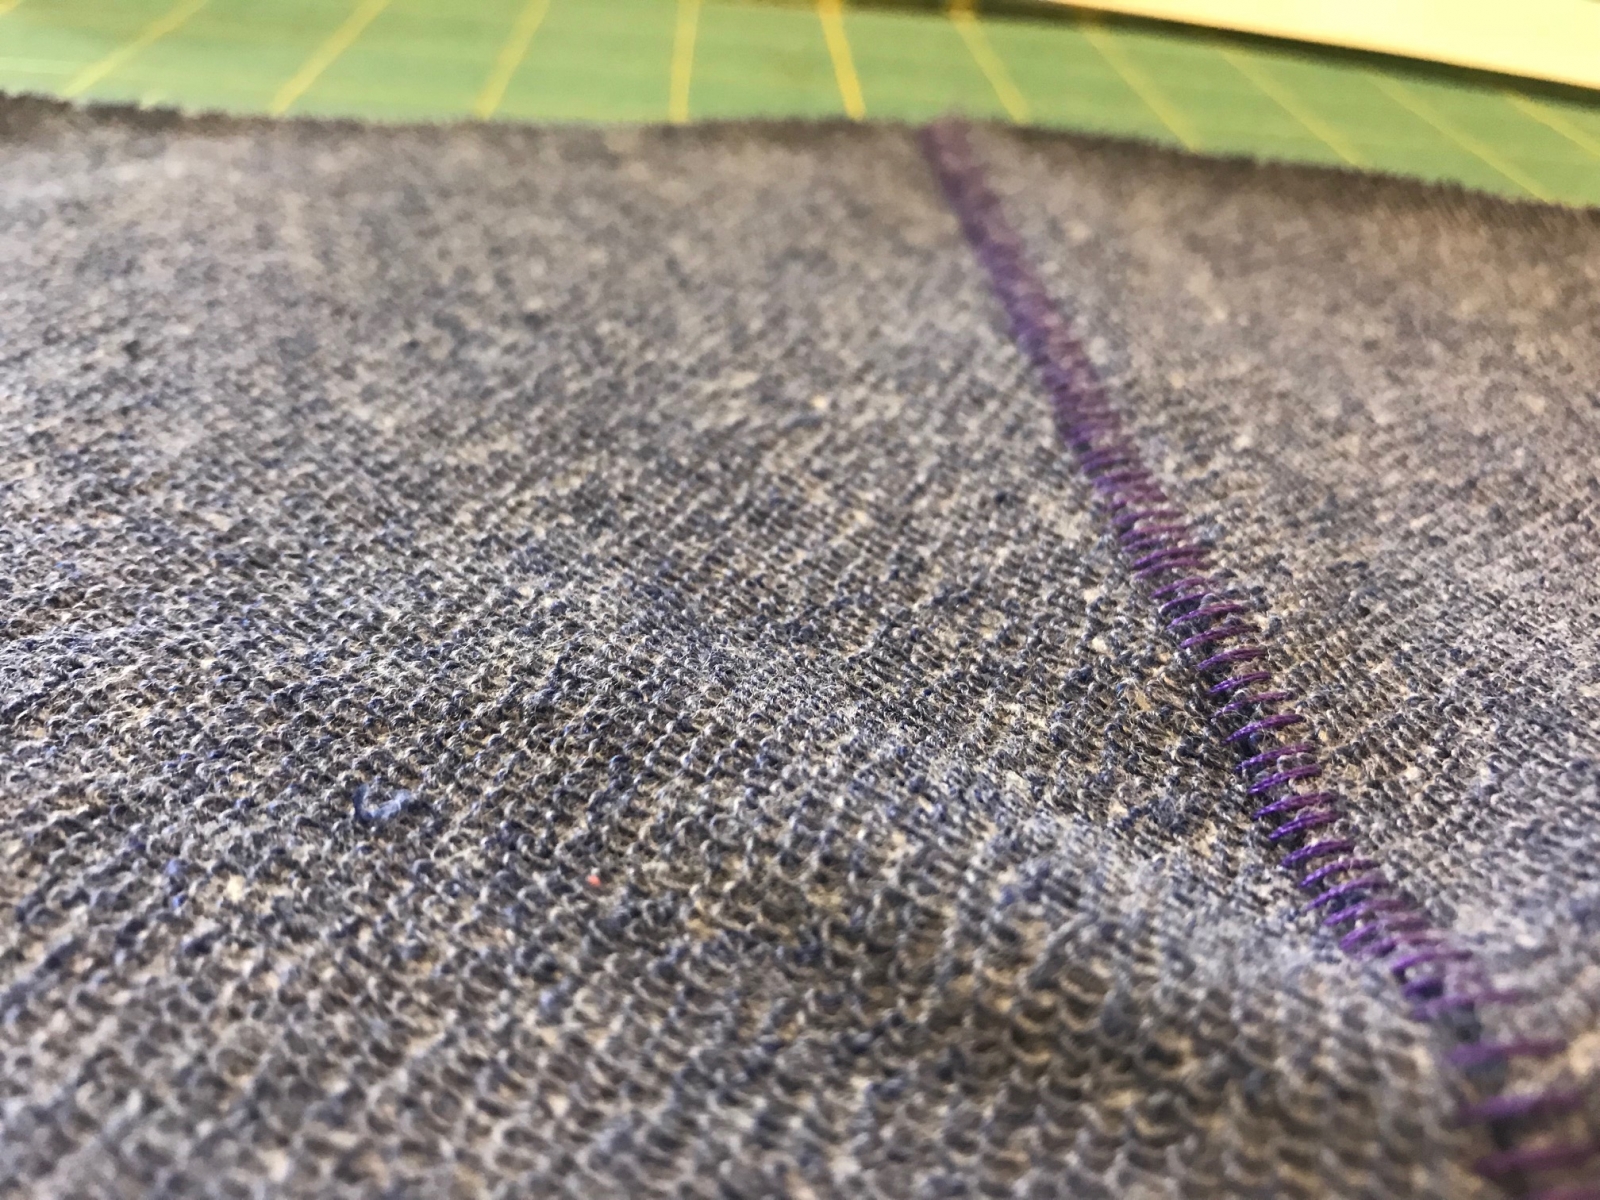
The next step is to set up your machine. For the tutorial included here, you need both loopers threaded but ONLY the left needle. You can take the right needle out if you wish, but I left it in unthreaded (I tend to be lazy that way). The TOP looper thread is the one that will be visible from the outside of the garment (along with a tiny bit of the bottom thread), while the needle thread will really only be seen on the inside of the garment.
Make sure that the knife is up and disengaged and that the stitch finger is toggled away from you (and towards the presser foot) as if you were doing a rolled hem.
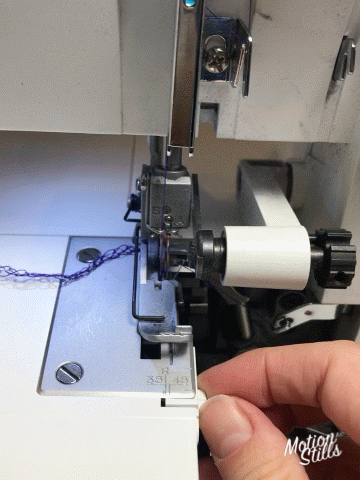
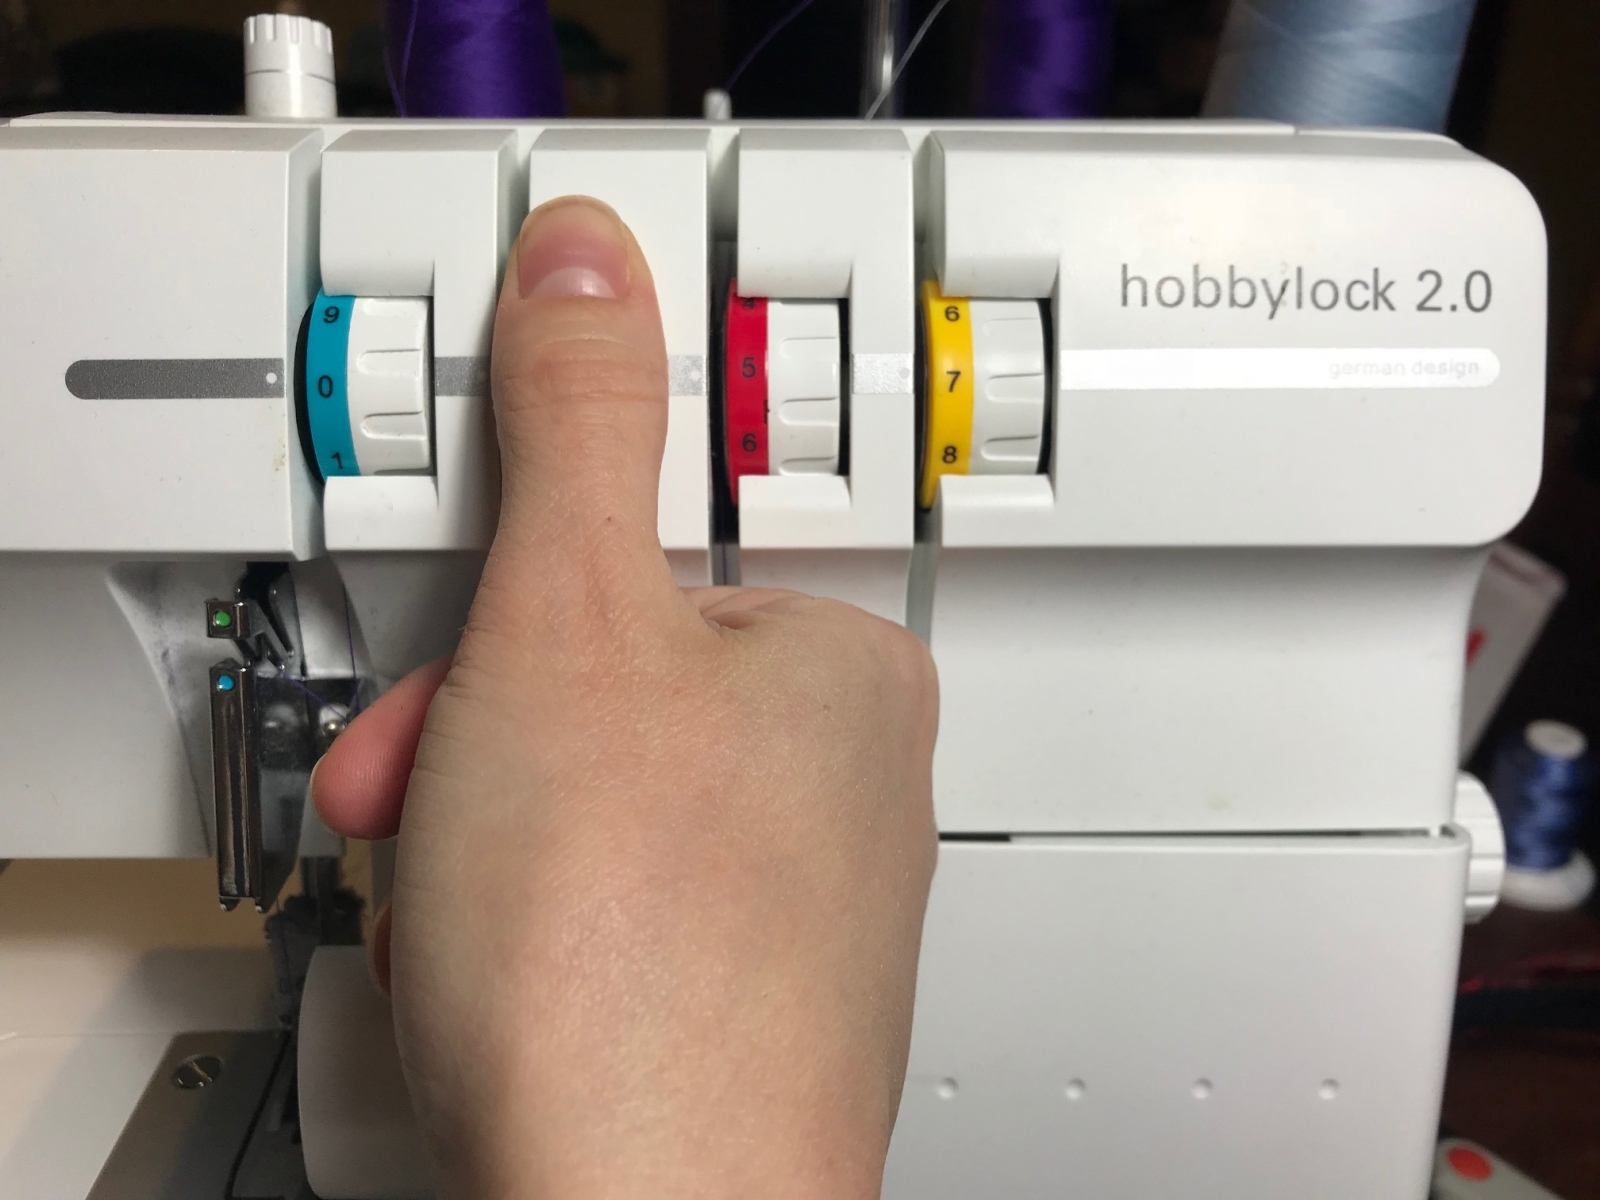
Next, set your tensions. The most important thing is that your left needle be set at 0. NO tension in your needle thread. The loopers can vary. Here I have them set to 5 and 7 respectively, but you may want to play around to see what works for you.
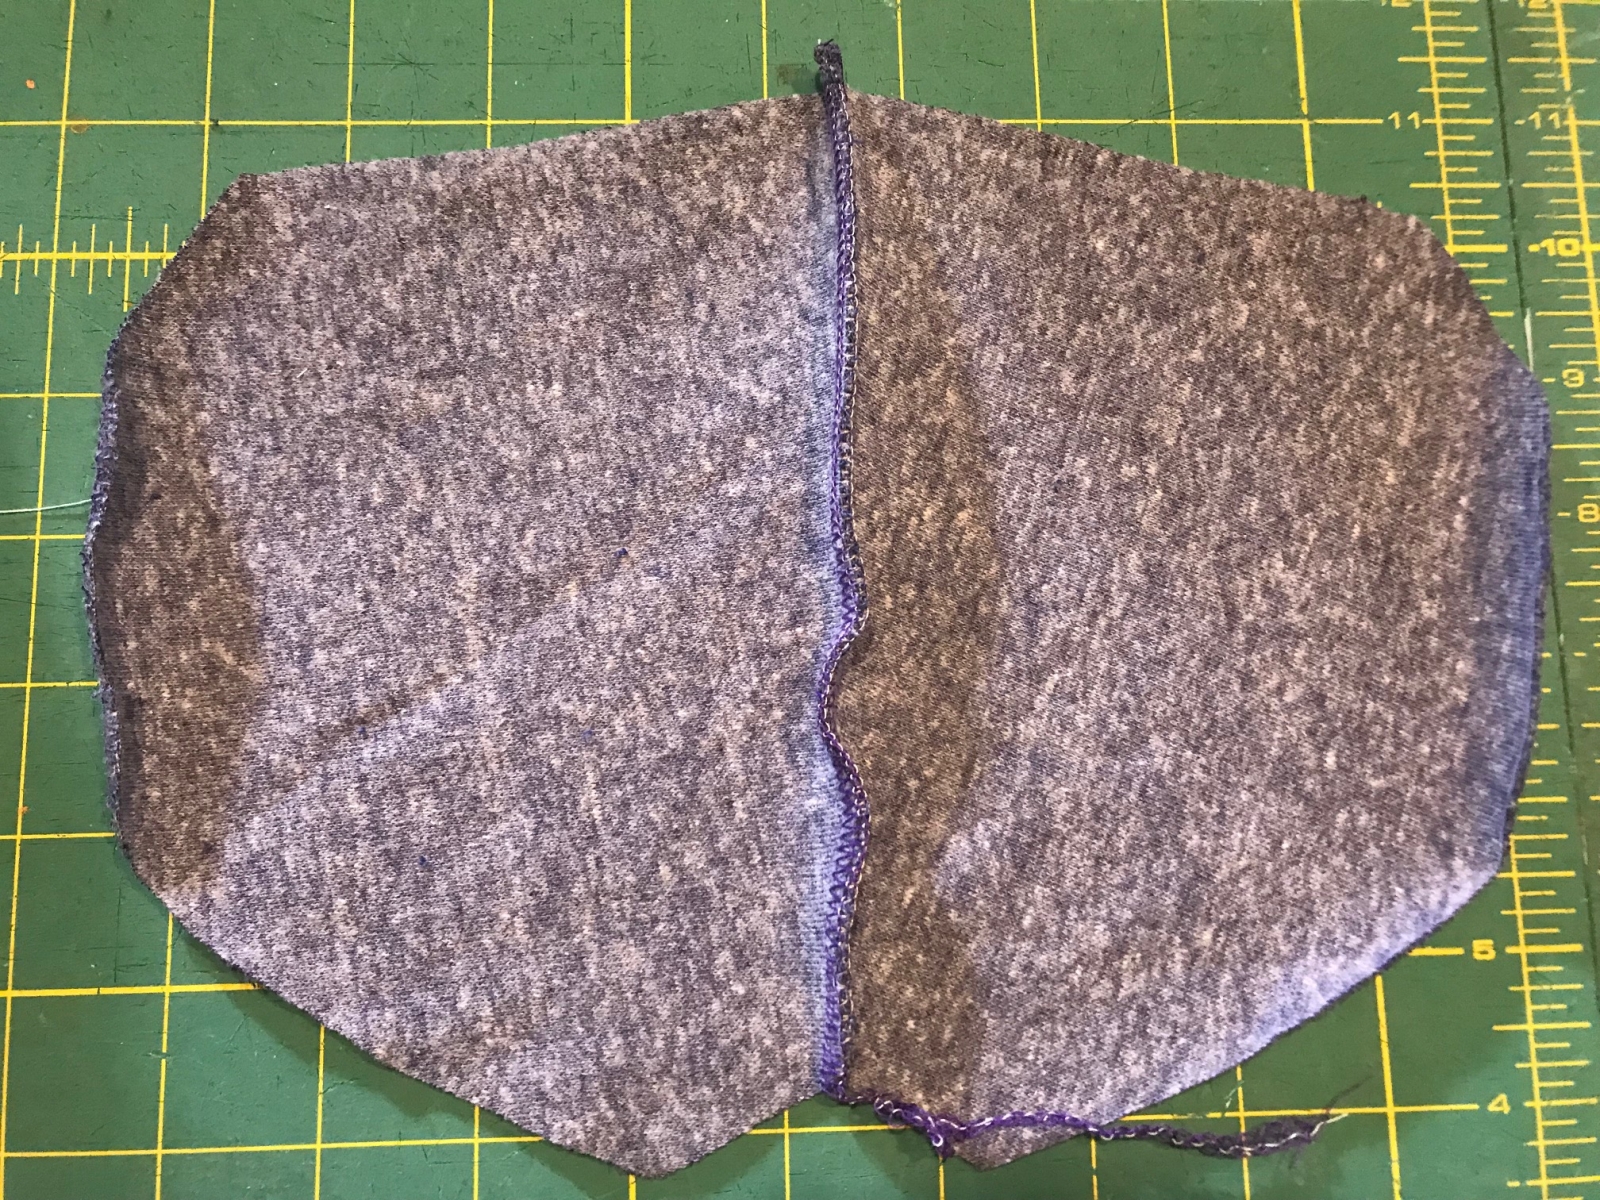
Unlike traditional seams where you place the pieces right sides together, do the opposite. The pieces should be WRONG sides together, and the raw edges aligned.

Place the pieces of fabric under the presser foot, making sure that the raw edges line up with the edge of the plate, right where the excess fabric would be cut off if the knife were engaged.
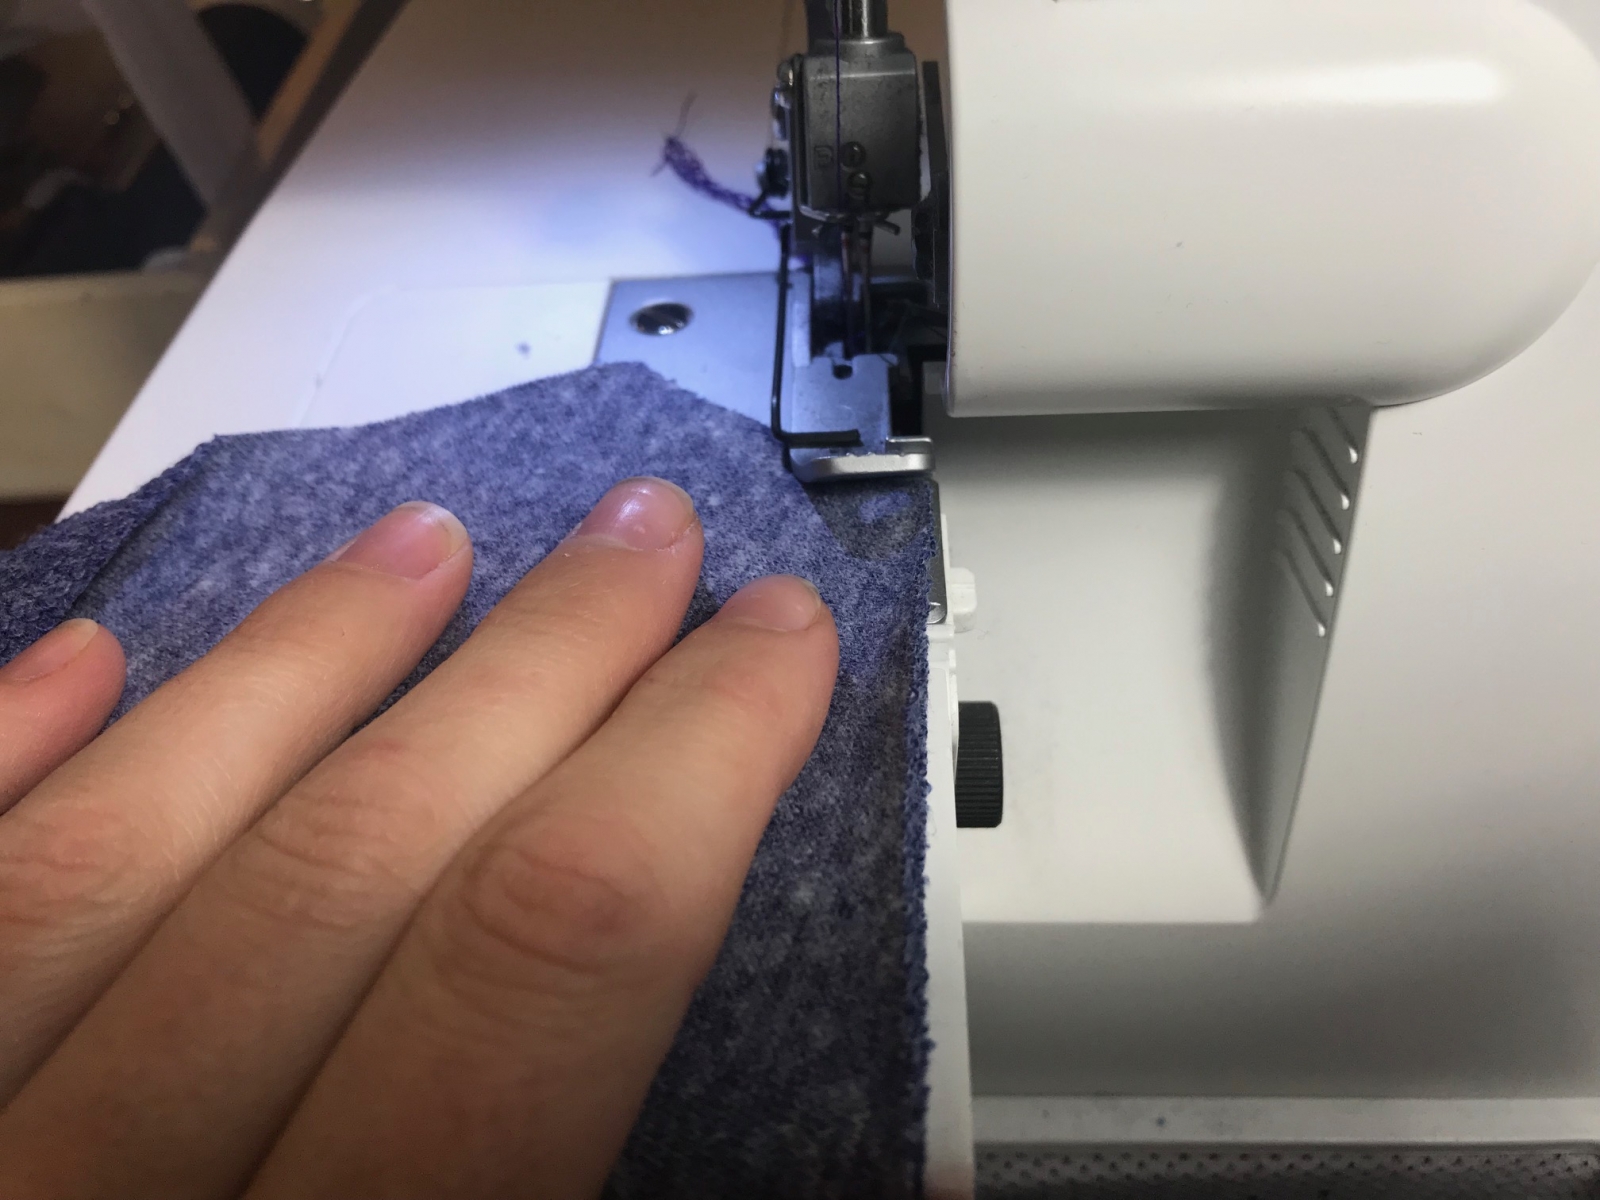
Run the fabric through the serger making sure that the raw edge stays as close to that edge as possible.
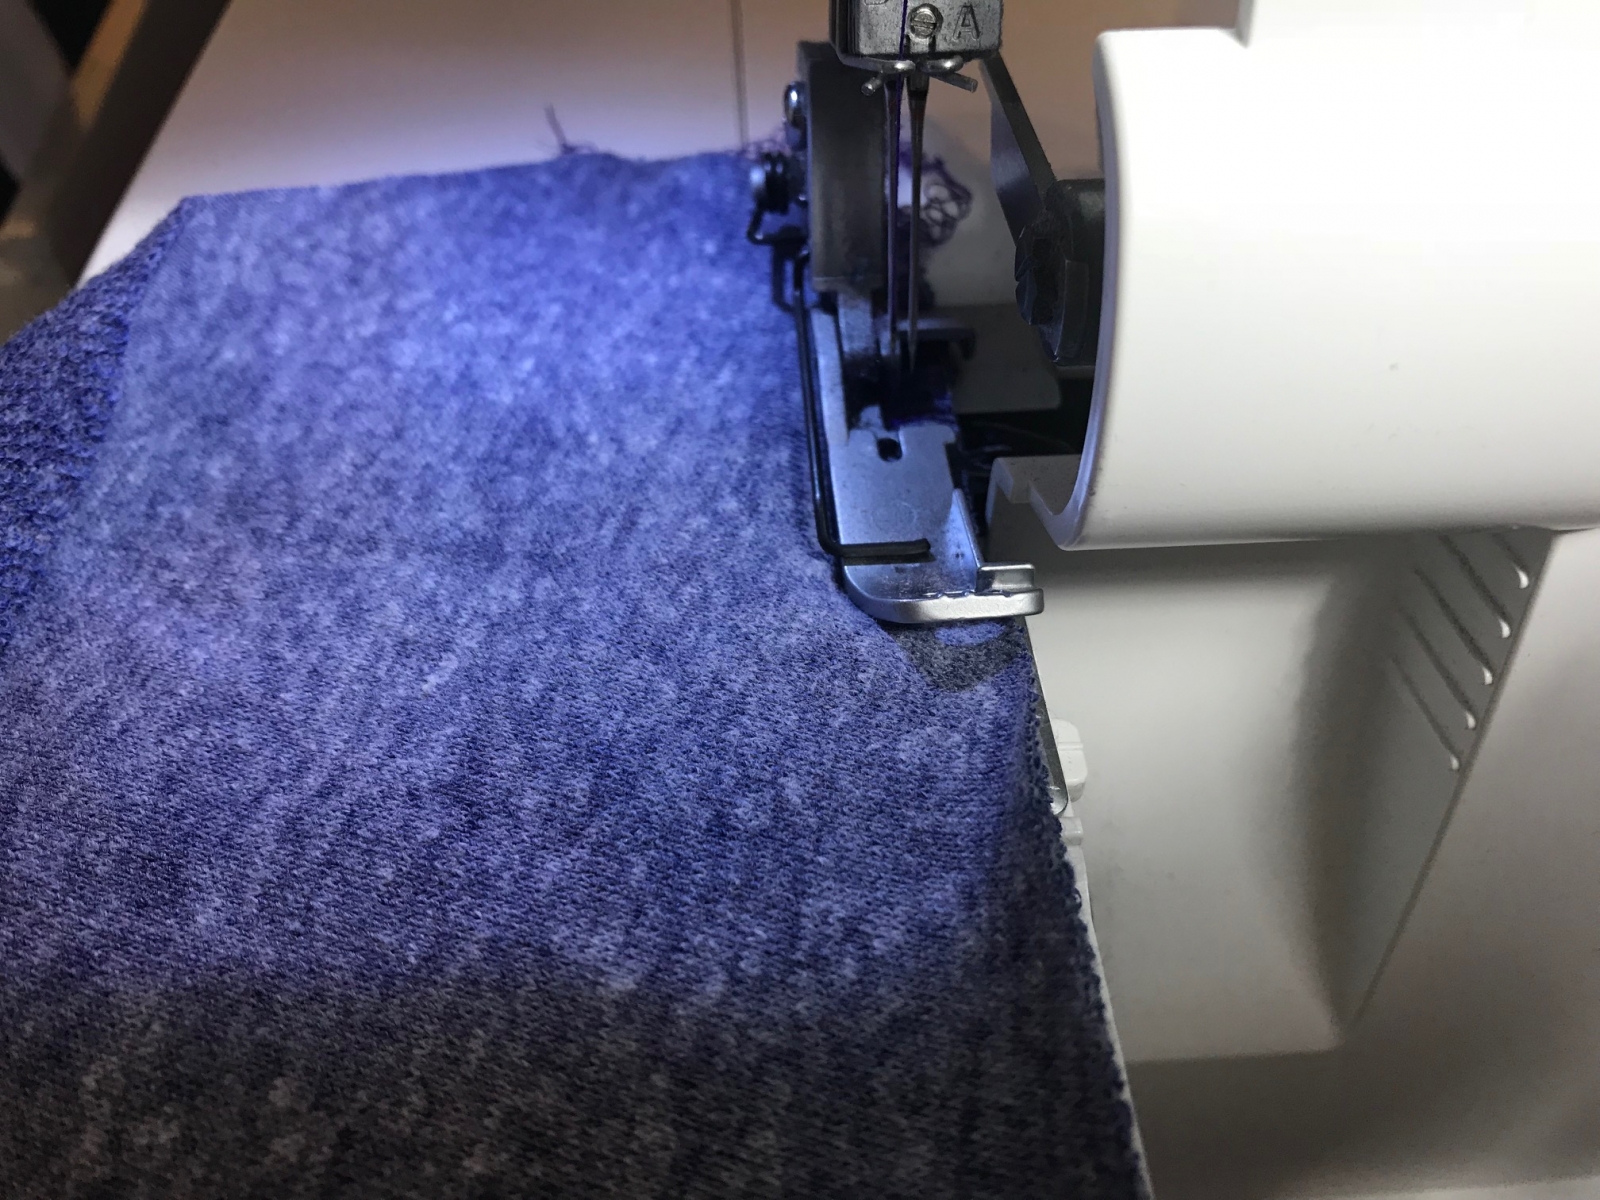
Once the seam is finished, it will look just like a reagular serged hem. You're not done yet though! 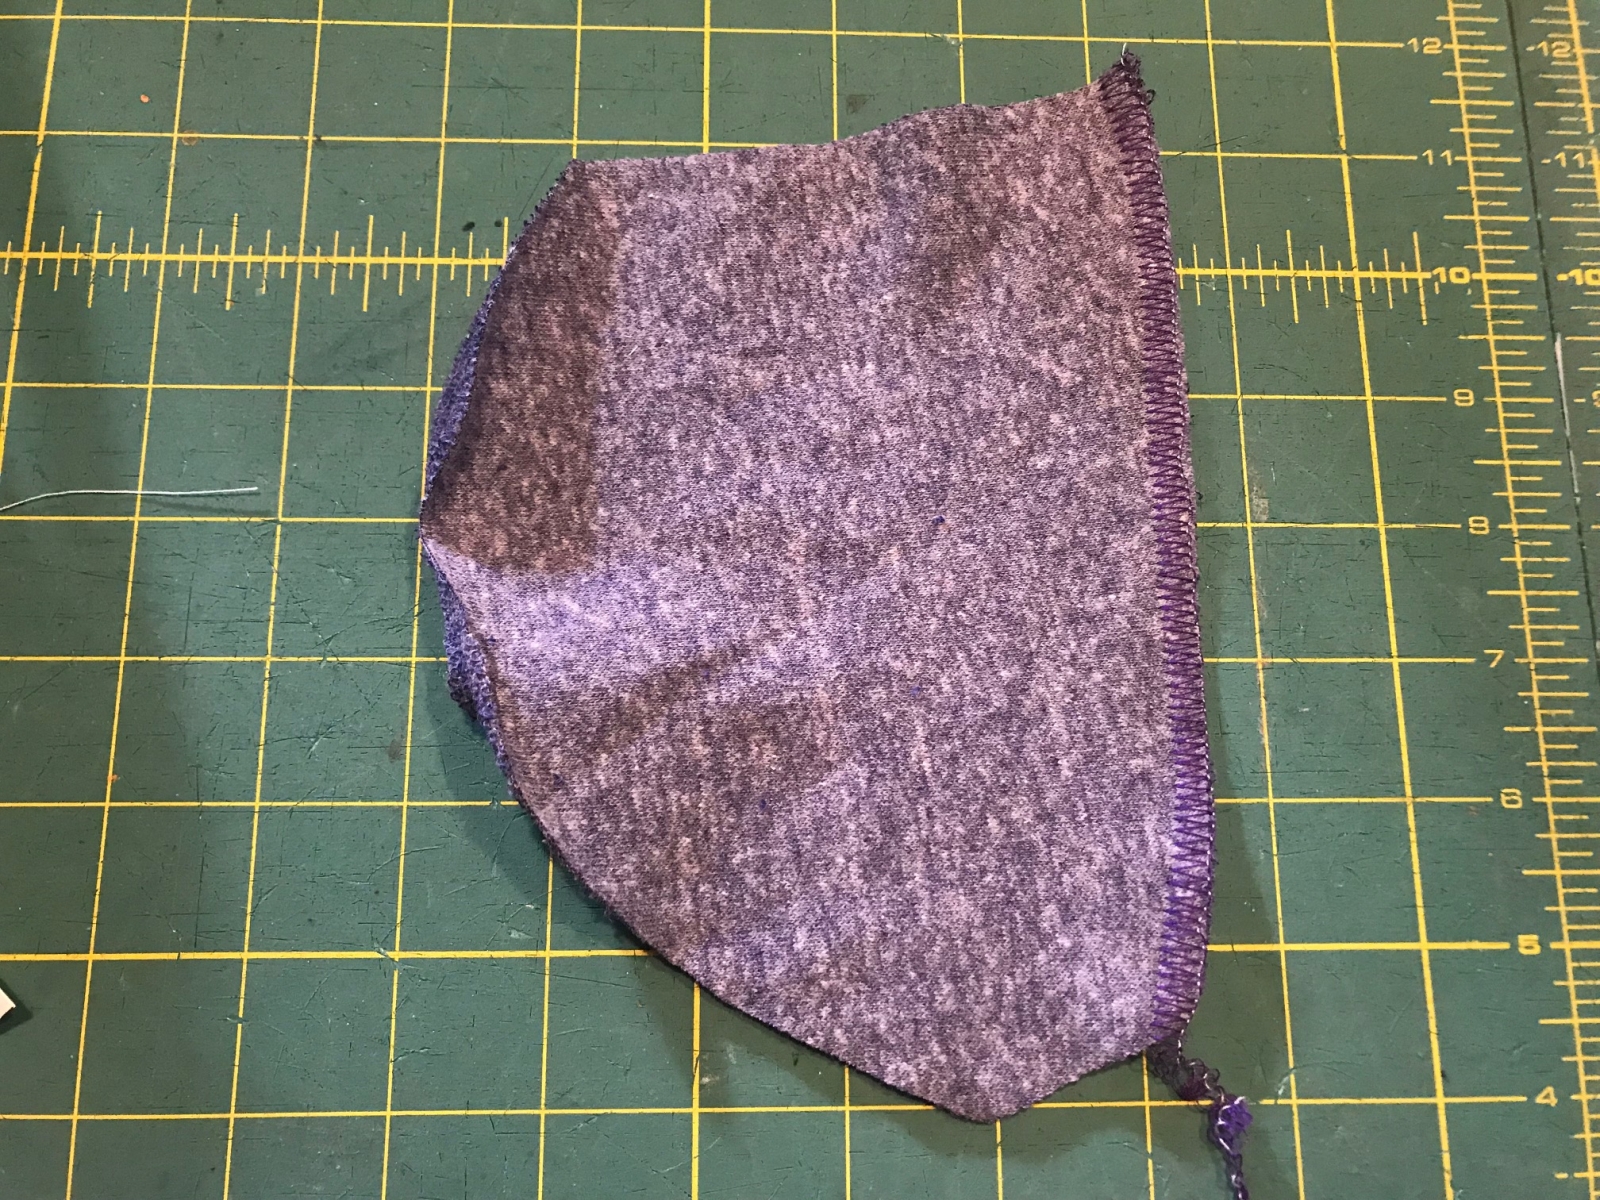
The only thing left to do is pull the two pieces of fabric apart. As you do this, two things will happen. The first is that the raised seam will be smushed down to lie flat against the fabric. The other is that the needle thread will form a ladder look in the back of the seam.
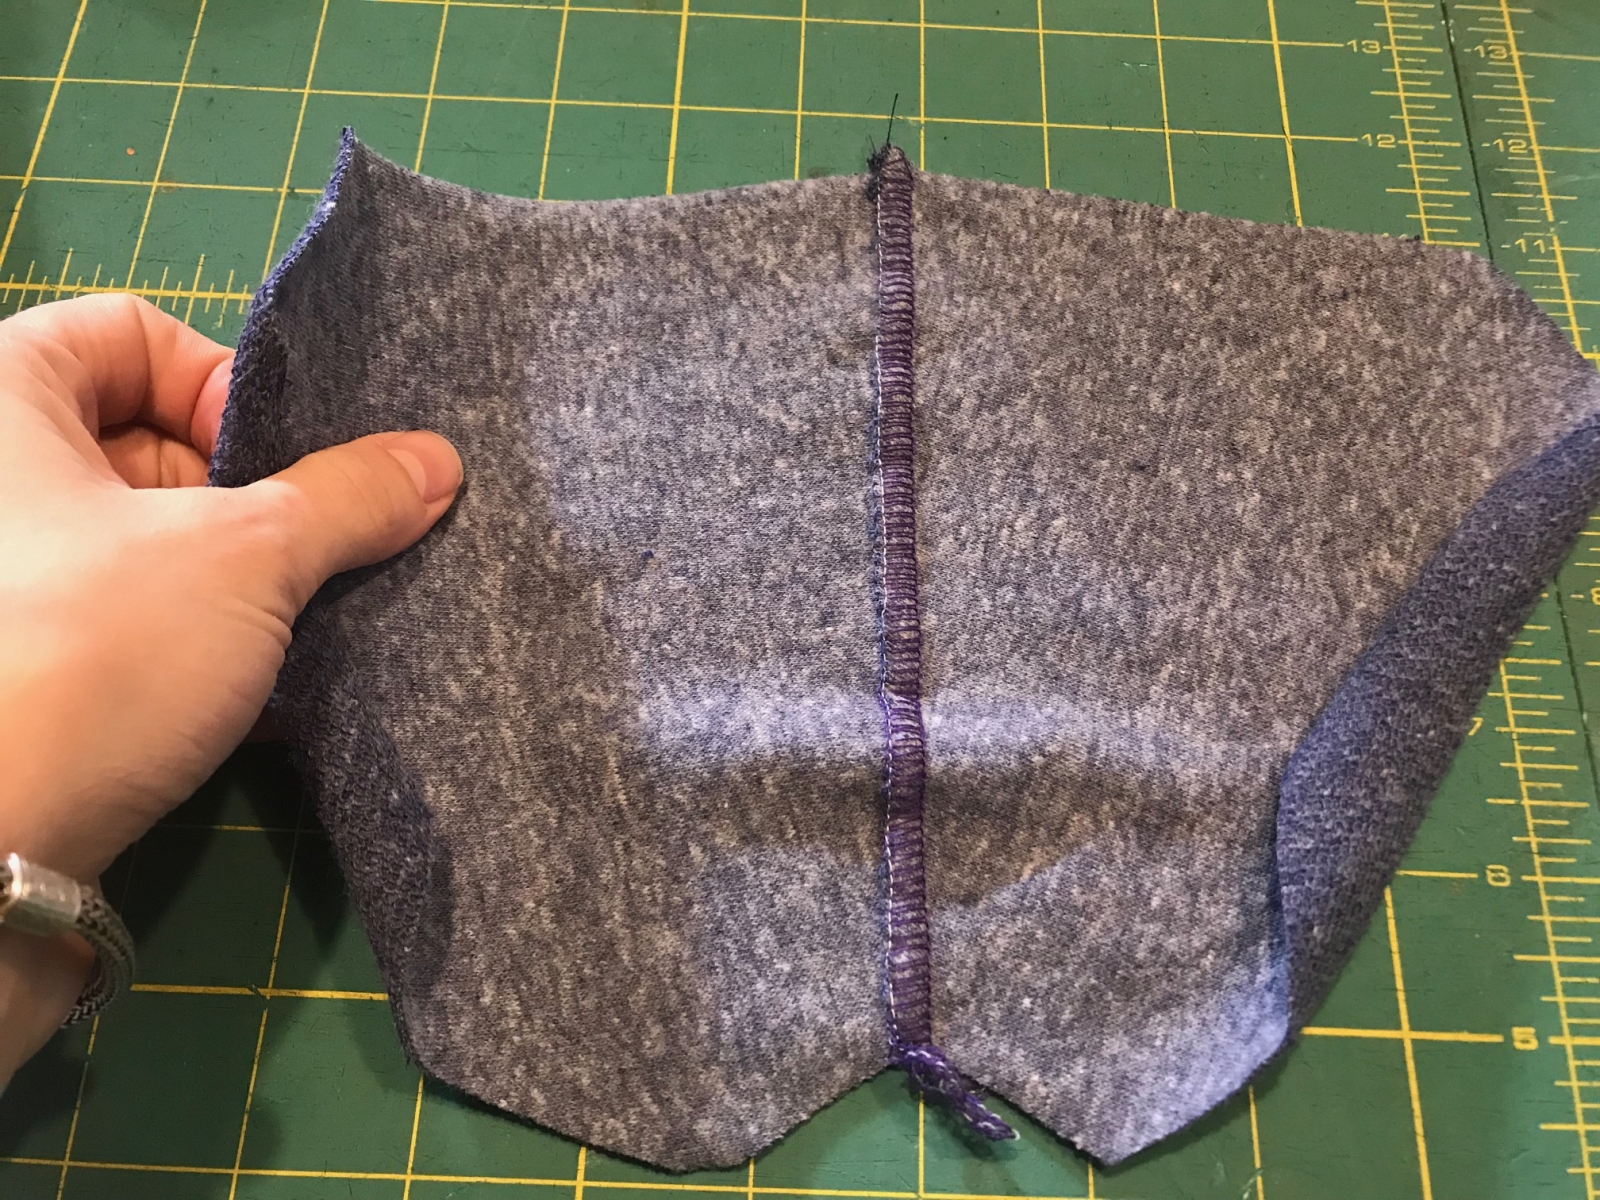
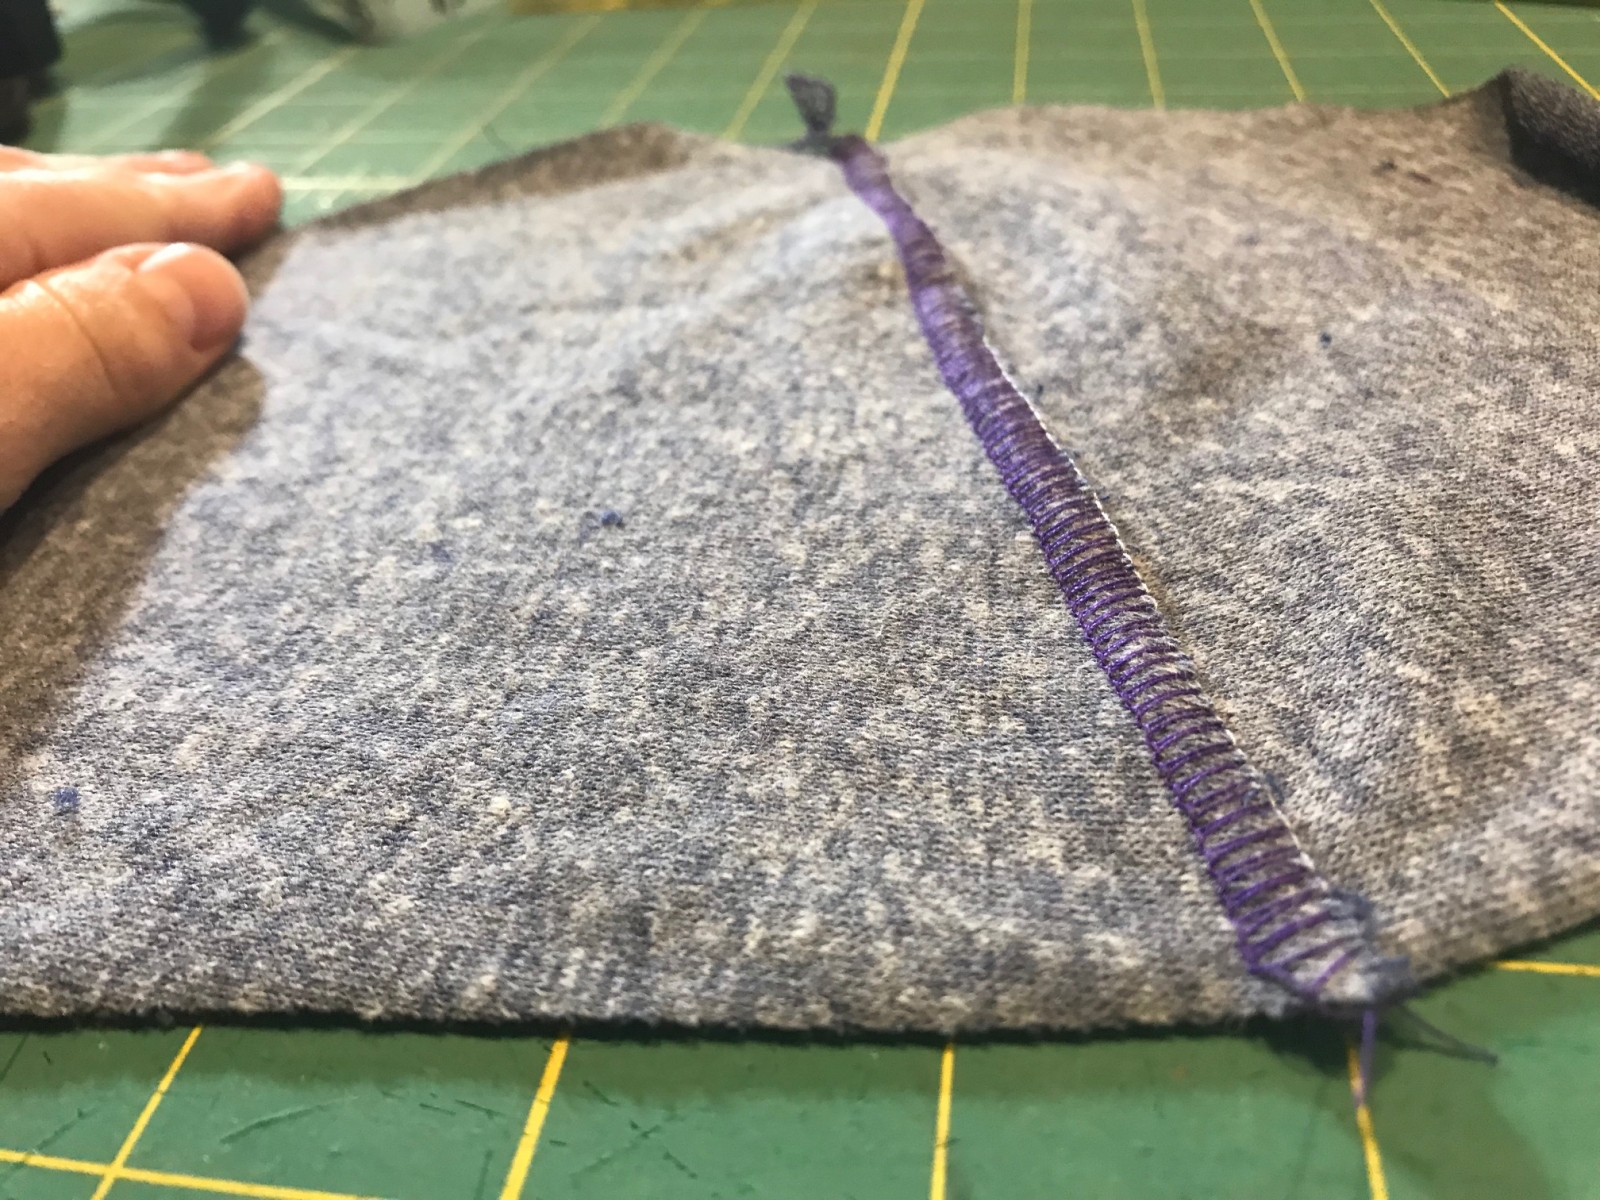
From there, you can iron and continue with construction as normal.
It's easiest to flatlock straight seams. Curved seams are not impossible, but they tend to be a little bulkier in the front since there is more fabric on one side of the seam than the other. Go slowly and carefully.
I hope that this technique helps you! Don't forget to practice on some scrap fabric to make sure you see what looper tensions work for you!
Happy sewing, as always!
Katie