Testing, testing 1,2... is this thing on?
Testing is a crucial part of pattern development. Through testing, everything from fit to assembly from, grammar to syntax, from instructions to final tiling, are scrutinized by several testers over several rounds.
Because it is such an important step, most pattern designers work with a core group of people who have proven themselves over many testing cycles to be reliable in their work, feedback, and promotion.
DBD feels that, as important as it is to have that reliable core group, it is equally important to have fresh perspectives and give other people a chance to knock our socks off. To that end, we typically include 3-5 completely new testers each round.
That’s why every so often you will see a post on the group promoting a tester call: an invitation to apply to be one of the new testers.
Here are some tips to improve your chances of being selected
1) Awesome pictures.
You don’t have to have special equipment. I don’t care if you shoot with a Canon 5D or an iPhone as long as the photos are good.
The focus should be on the pattern and/or fabric (depending on what the photo was for). This is not a time to be artsy or focus on landscape; make sure that the model stands out from the background. That being said, a nice background is a must; whether a backdrop, clean wall, or somewhere outside. I really don’t want to see your laundry piles. I mean, I’d be happy to commiserate... but this isn’t the time or place.
Good lighting as also an imperative. Whether you are outdoors or in, make sure that you have your subject lit from the front or side. While backlit pictures can be beautiful, they aren’t good for promotion pictures.
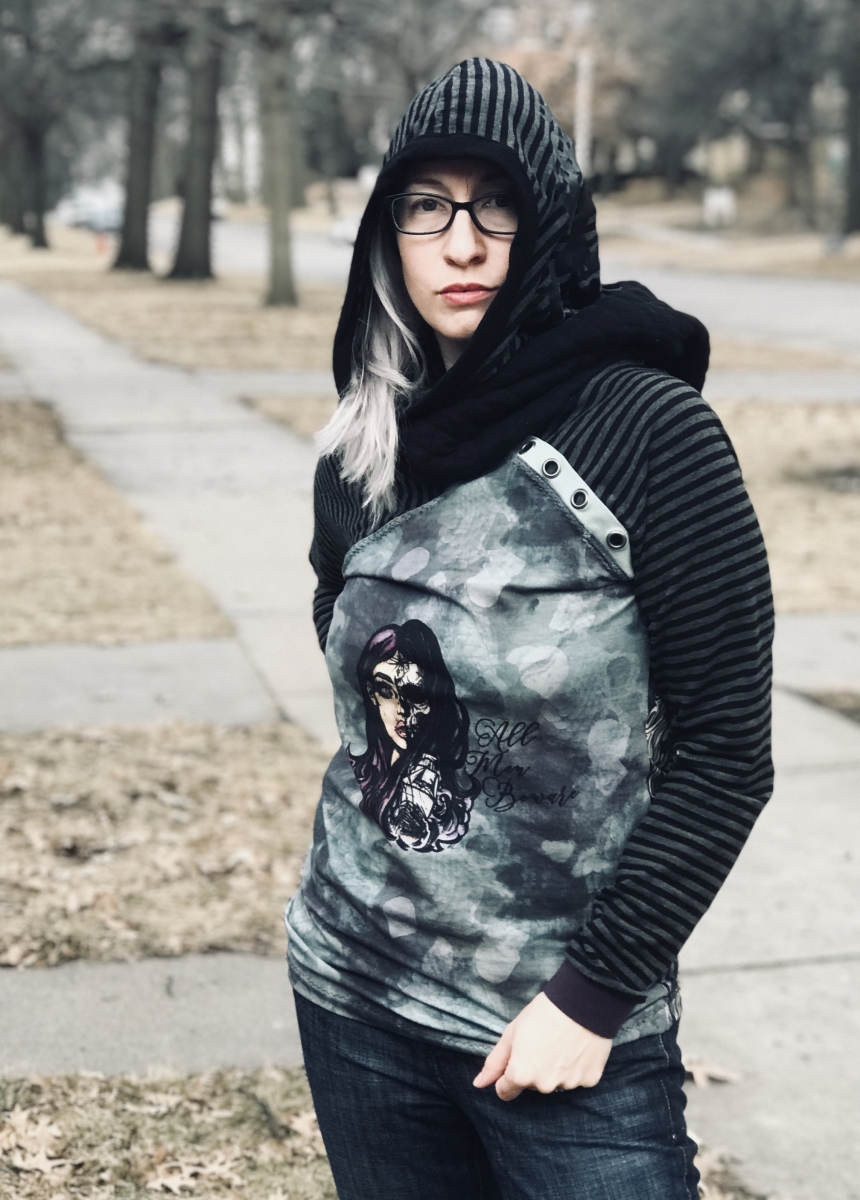
Familiarize yourself with the settings on whatever camera you use. Some phones offer portrait mode and can automatically blur the background (bokeh), separating the subject even further from the the background. This picture of me looking super fierce was taken (by my husband) with an iPhone7 plus with portrait mode. See how the background is blurred; It forces the eye to focus on the subject (the model and the pattern).
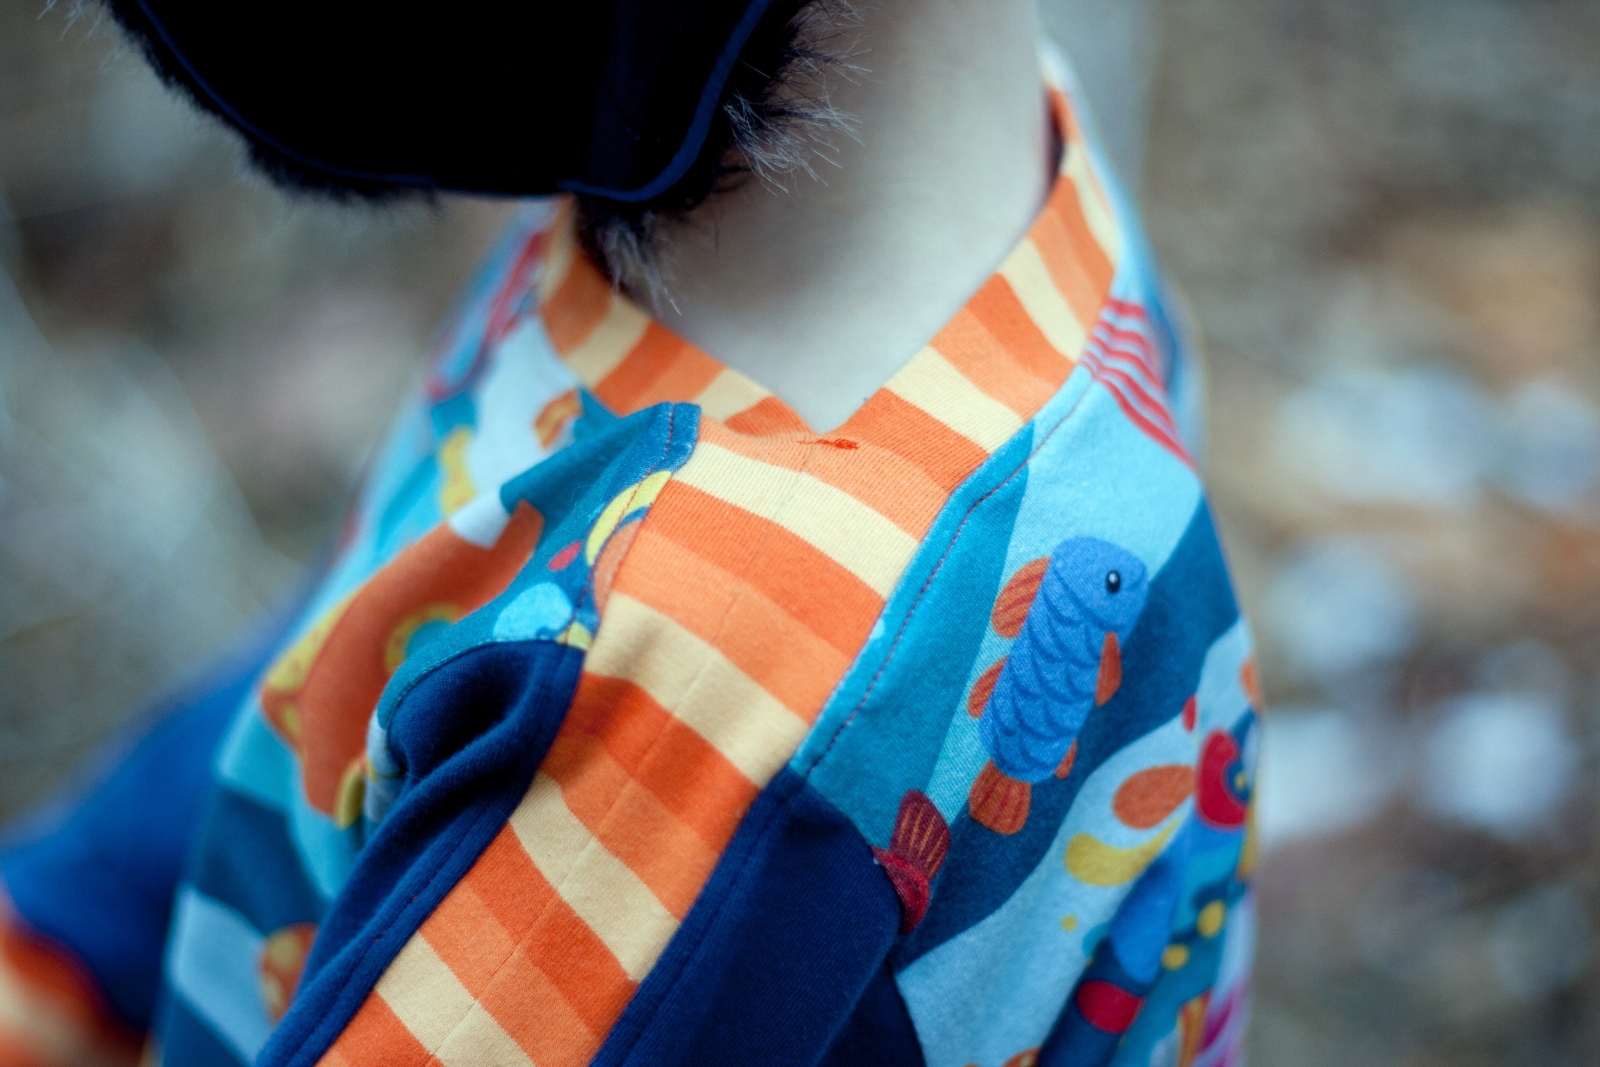
If you are using a DSLR, make sure that you know at least how aperture and shutter speed work. Sometimes the manual setting is enough, but to really get that “wow” factor, it takes a little more. The photo below was taken on a cloudy day with a 50mm lens, 1/320s, f/1.8 (pre editing).
If you don’t have any way of getting this sort of effect from your camera, invest some time learning a photo editing software or even app. There are plenty of decent free ones out there (for a long time, I used Picasa. It’s not being offered or supported anymore, but you can still find it available for download). If you are serious about getting into testing and photography, consider testing out Adobe Lightroom; they have free trials.
2) Be honest.
If the tester application asks you to rank your sewing skill, don’t say that you are an advanced sewist if you can’t set a zipper. Some people worry that if they aren’t a professional sewist, they won’t get picked. This is NOT the case. While professional sewists are very important to the testing and promoting process, it is just as important to have beginners in the group.
For one, beginners are more likely to point out deficits in the instructions. It is a true test of how thorough the instructions and pictures are. For another, it’s important for gauging the pattern’s difficulty. If all of the beginner testers are struggling, it’s a good sign that the instructions need to be improved and/or that it’s an intermediate pattern.
While beginner testers are important, be honest about yourself about what you are willing to learn or do. I usually disclose whether a pattern in testing has any tricky techniques such as zippers, welts, grommets, etc. While I and the admins (or other testers) are happy to help when we can, it is not our job to be teaching testers how to sew.
It is also important to be honest with yourself about the time commitment it takes to test. Often, testing runs for two weeks and will require that you sew up two or three examples of the design. If you have plans for vacation, have a machine in the shop, or otherwise suspect that you won't be available for the whole two weeks, consider applying another time.
3) Presence.
When I am looking down the list of people who have applied to test, I am always looking for names that I recognize from around sewing and fabric groups.
A huge part of being a tester is promoting the pattern. If I see a name I recognize (even if I don't know exactly where from), I know that person is active in groups and is more likely to be proactive in promoting the pattern when it is released. It's even better if I recognize the name from the DBD wall. I know that this is a person who is already part of the DBD community and is more likely to be engaged in the test.
4) Make sure your public online presence is presentable.
If a cursory Facebook search for your name turns up a bunch of drama or mean posts, it’s a huge red flag. We can disagree on things, but if you aren’t respectful in your public presence, I will not invite you to represent DBD.
4) Don’t be afraid to show off your fun side!
The tester group will be working together for at least two weeks. It’s so much better if the task is fun rather than a chore. Whether it’s through your answers, your comments, your poses, or your photography let us know that you’re not afraid to get silly and playful. I certainly try to be!
What about during testing?
There many things to keep in mind once you have been invited to test that will make a good impression and increase your chances of becoming a tester who keeps being invited back.
1) Follow the instructions. All of them.
A lot is riding on a test. The fit has to be consistent and true to the sizing chart. The instructions need to be clear and easy to follow. The tiling needs to be clean and clear. Good testers reads the pinned post and the expectations therein as well as the pattern instructions. They choose a size based on the sizing chart rather than their model's ready-to-wear storebought size.
It is very important to follow the instructions to the letter and not make modifications without first communicating with the designer. Typically, testers are invited to make modifications or embellishments once the pattern has been finalized.
2) Helpful feedback.
Good testers take the time to submit constructive critical feedback. A designer doesn’t need someone agreeing with everything they do. I would much rather you approach the pattern with a critical eye and do not take for granted that things are perfect; the first time around, they rarely are.
A good tester doesn’t make assumptions if something isn’t clear or not working. It's not always user error! Designers neeed to know if the steps need clarification, if something doesn’t make sense, if the pattern pieces aren't going together smoothly, if the fit is off, and anything else that may come up during testing. We want the design to be the best it can be!
3 ) Meet the deadlines.
Once the testing group is gathered, the clock starts. Usually there are several dates: the date fit pictures are due, the date feedback is due, the date final modeled pictures are due, and the date to start promoting the pattern. If multiple versions are required or if there are multiple options, there may be more than one due date for fit and feedback.
If a tester does not meet meet these deadlines (and has not communicated with me; there are many very valid reasons for not meeting deadlines and I try to be very understanding) it raises a huge red flag.
4) Do your best work.
The first version, the first time, a muslin (practice version) with cheap ugly fabric is perfectly fine. By the time final modeled pictures are due, the expectations are much higher.
I let my testers choose their own fabric, but I expect that it matches the description of the required fabric in weight and/or stretch; also that it be in good shape and accompanied by thoughtful coordinates
Seams should be tight and top-stitched when directed in the instructions. Ironing is crucial for that professional finished look. While it’s not necessary to have a serger or coverstitch machine, make sure to familiarize yourself with analogous sewing machine techniques (overcast, stretch stitch, twin needle, to name a few).
5) Pictures.
Just as we are looking for excellence in application photos, the same is true for final modeled pictures. The testers photos will be representing the pattern wherever they are posted. They are a massive part of the commercial success or failure of the pattern.
6) Promotion.
There is a fine line between promoting a pattern and spamming it everywhere. The two are often used interchangeably, but a good tester knows when to stop before it becomes a nuissance.
Check the wall wall where you will be posting. Has the pattern been posted several times already? Maybe just bump the posts that are already there with a comment and a picture.
A great way to promote patterns withough flooding peoples feeds to to look for pattern recommendation requests. A link and a picture along with a blurb about what’s awesome about it is plenty.
It also helps to post on Pinterest, Instagram, their blog, or twitter (or more that I’m not aware of!)
There have been many times that a new tester has blown me away and has been invited back again and again. In fact, all of my regular testers fit that description. I love finding new people to work with. I hope sometime that I get to work with you!