RAWR nursing hack - guest blog post
Many of you saw the amazing RAWR nursing hack that Krissy Haines posted a little while ago. The snaps not only added functionality, but they also look awesome! I will let her tell you how to get this look. For the next week, the RAWR will be only $5 so snap it up and get this look today!
I am Krissy, ASL interpreter by day, mom of enough kids to start my own sports team by night. Sewing is my therapy and my kids know if mama is sewing, do not disturb!
While nursing shirts have become more mainstream, the style has not changed much in my years of needing them. So combining therapy and creating something with function is a win-win!
Materials
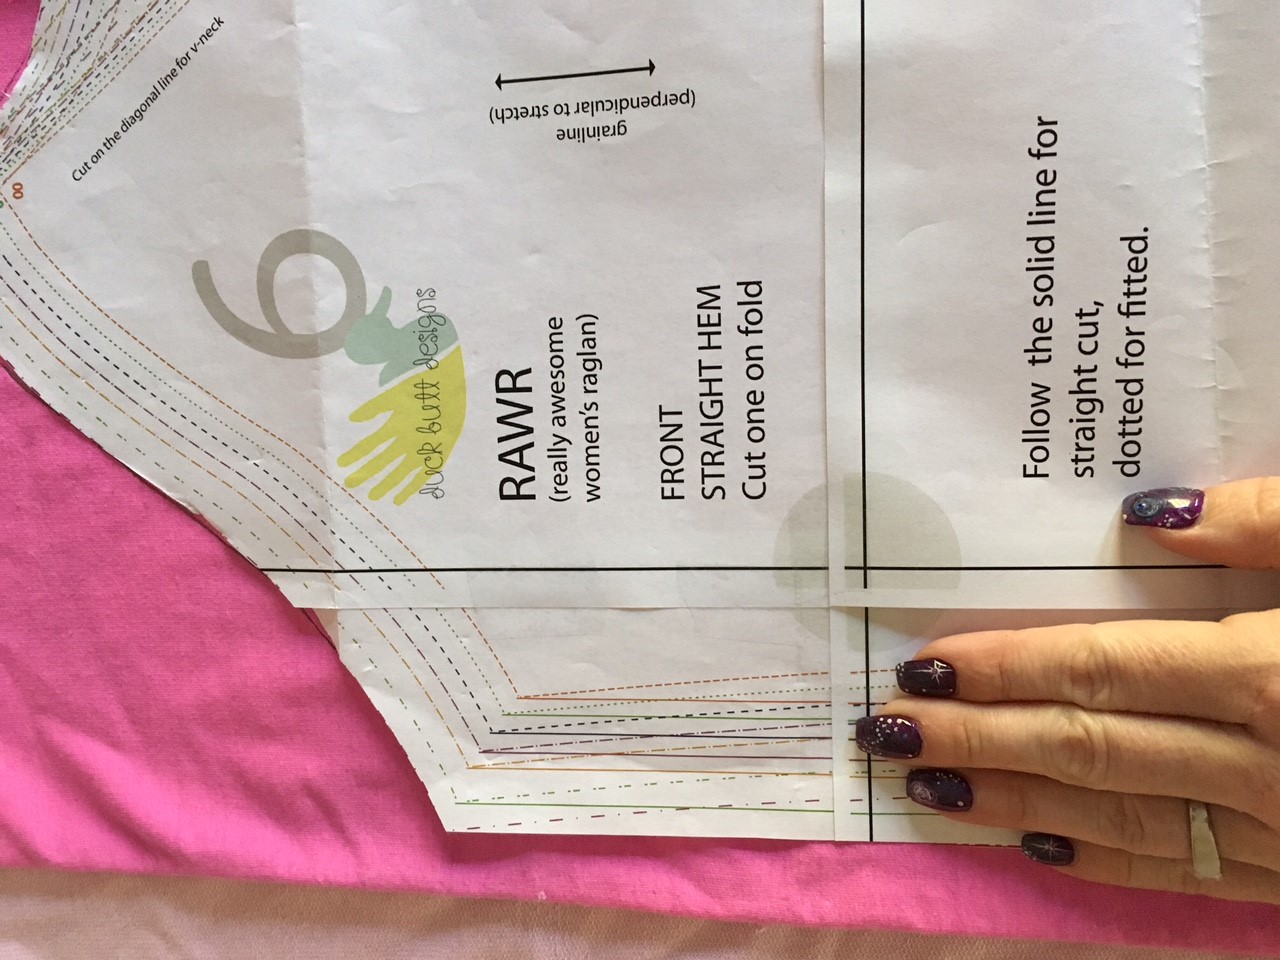
Cut all pieces out that are required for your RAWR.
The only additional pieces you will need are the following:
-a second front piece: Measure (or eyeball) how much from your armpit down will cover your bust. I cut this piece under the text “dotted for fitted” where I have the pattern folded, or around my thumb. *Note from Katie: this will be the modesty panel underneath the front flap
- 2 strips of fabric: 2 inches wide and a little longer than the arm of the front pattern piece
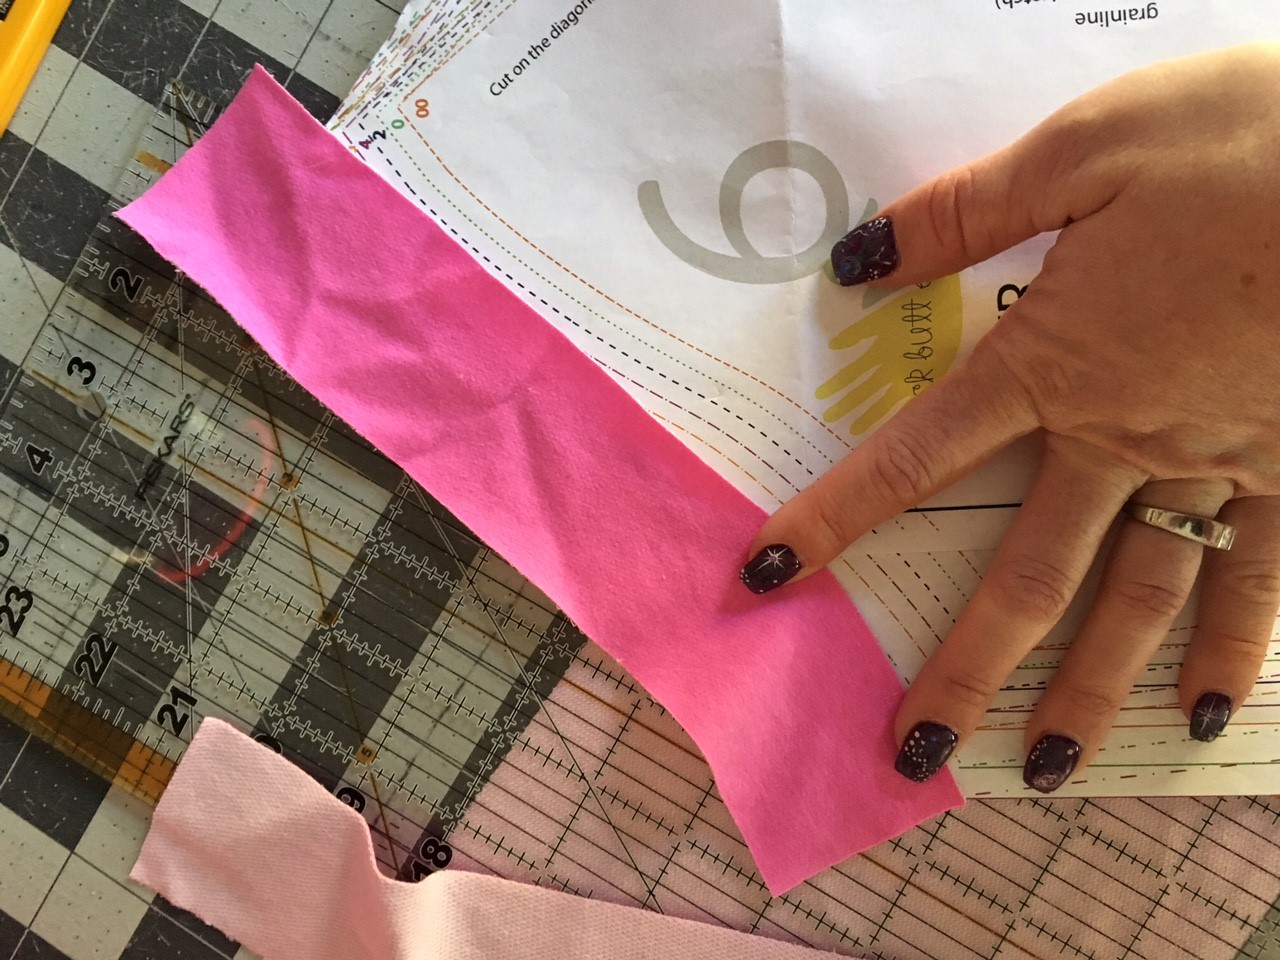
- A third strip of fabric: This will be the same 2 inches wide by the length of the neckline on the front pattern piece. You will not need to calculate the 80% neckhole because you will be adding inches to the neckline from the side strips.

Instructions
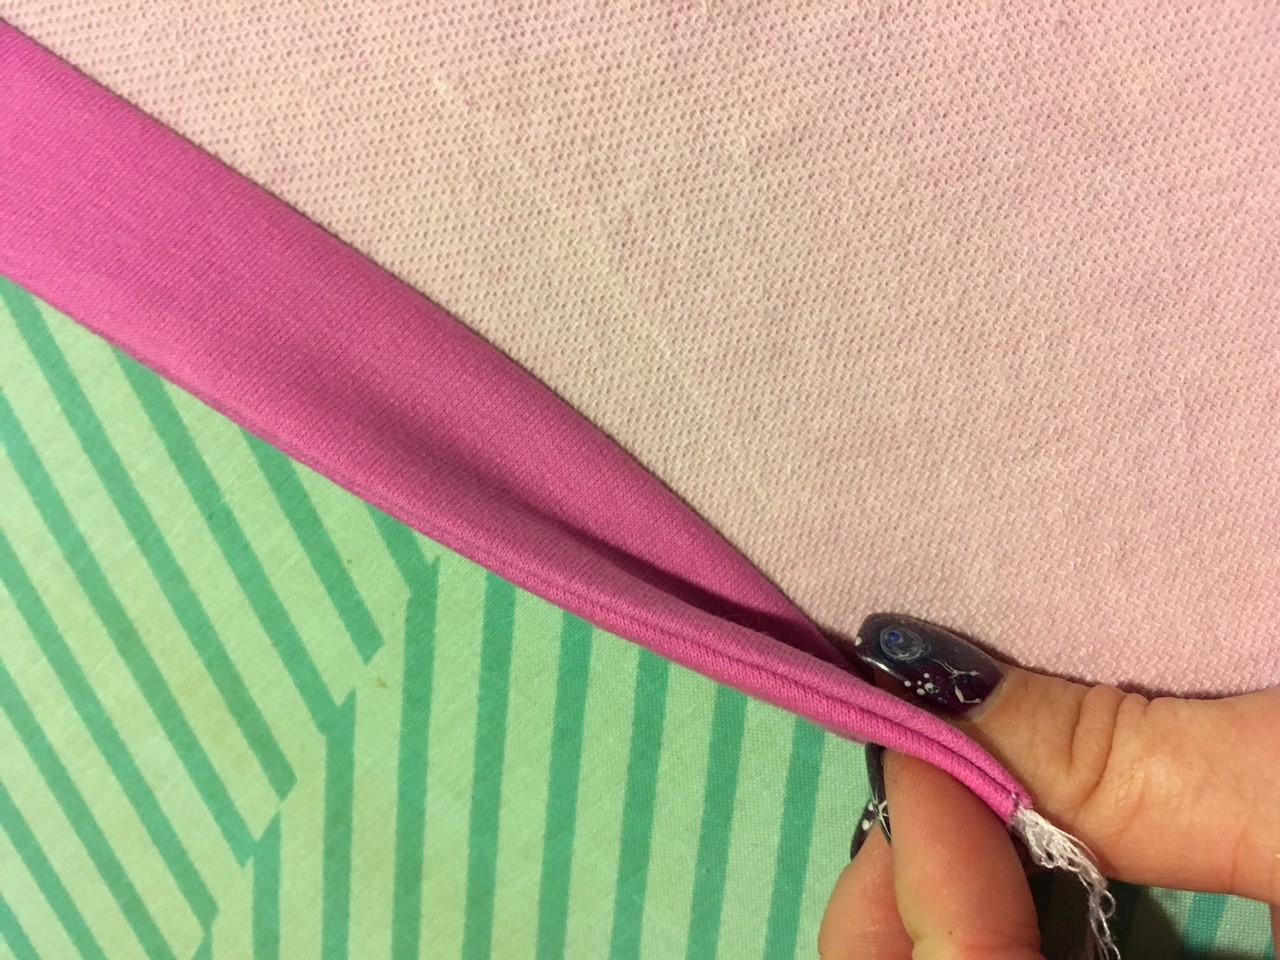
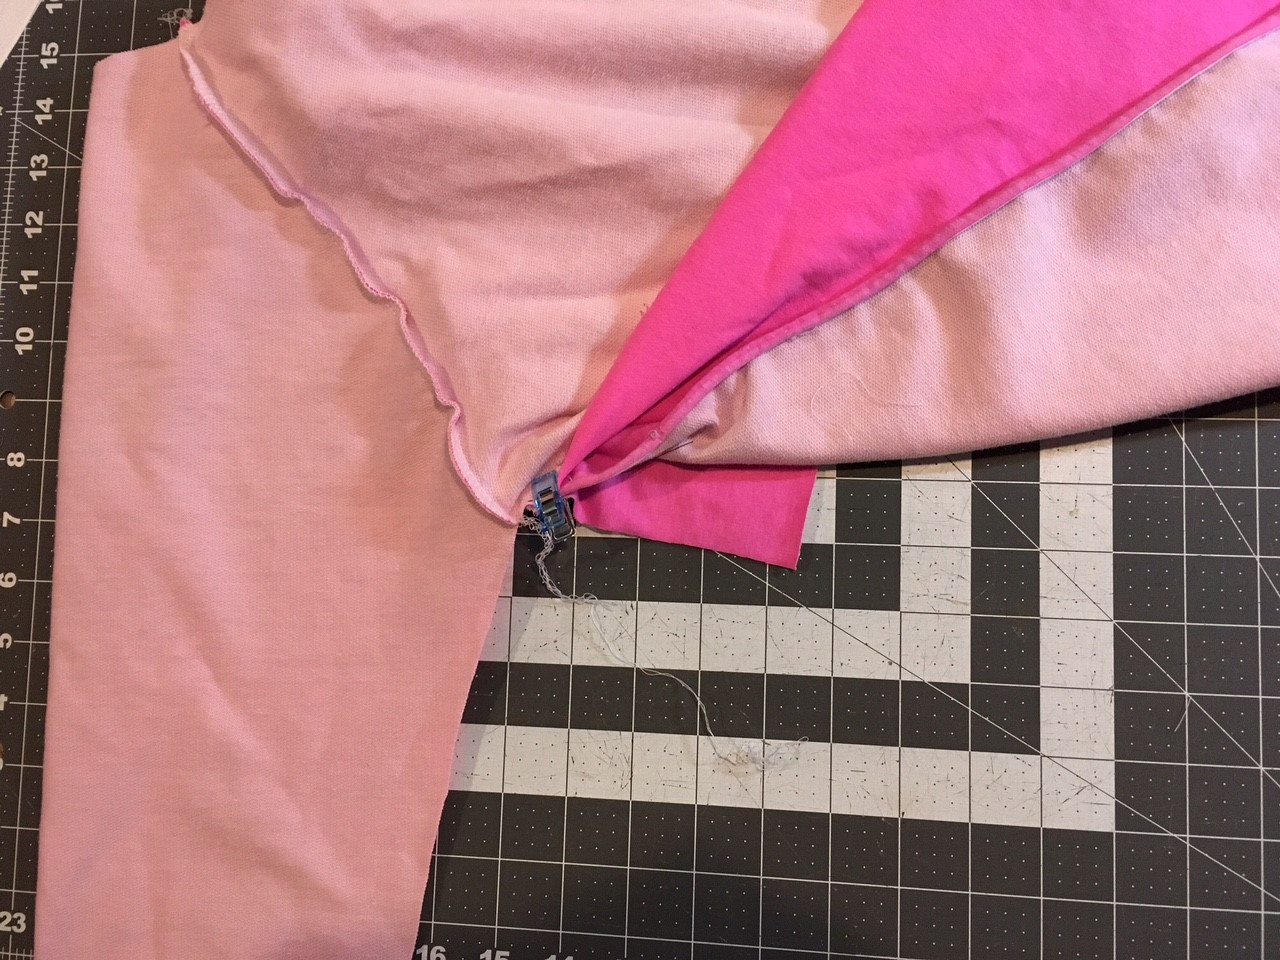
Sew the first 2 strips to either sleeve attachment of the full front piece (not the second front piece you cut for modesty!) . These will be the snap stripes. After you have sewn the snap strips, you will sew your neckline binding from arm side to side starting on the strip you have added
You will fold over the strips so that the unfinished side meets the serged (or sewn) end. Iron to keep your place.
Fold that over one more time so the seam is even and iron again.
Sew binding in place
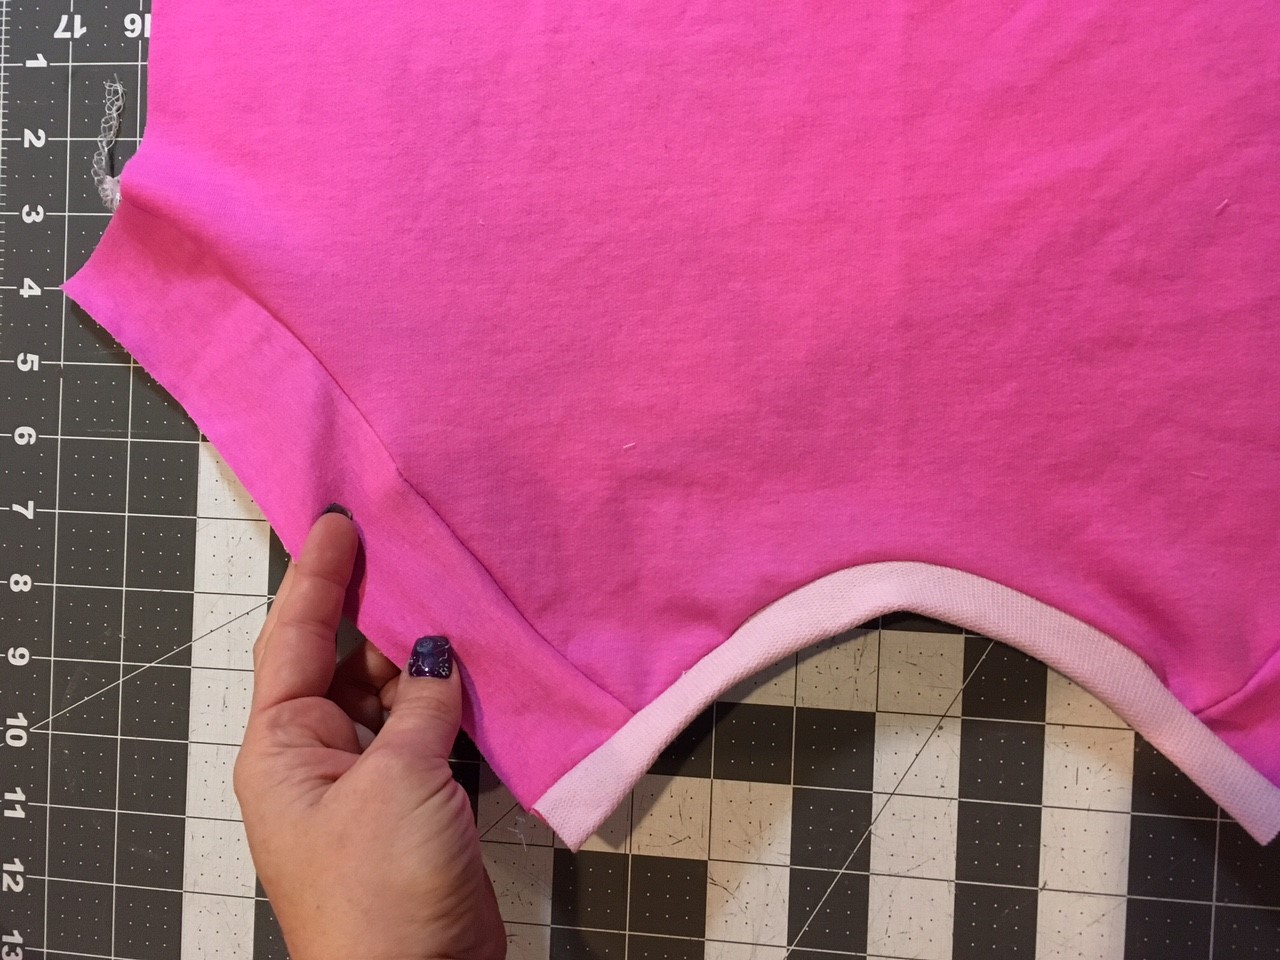
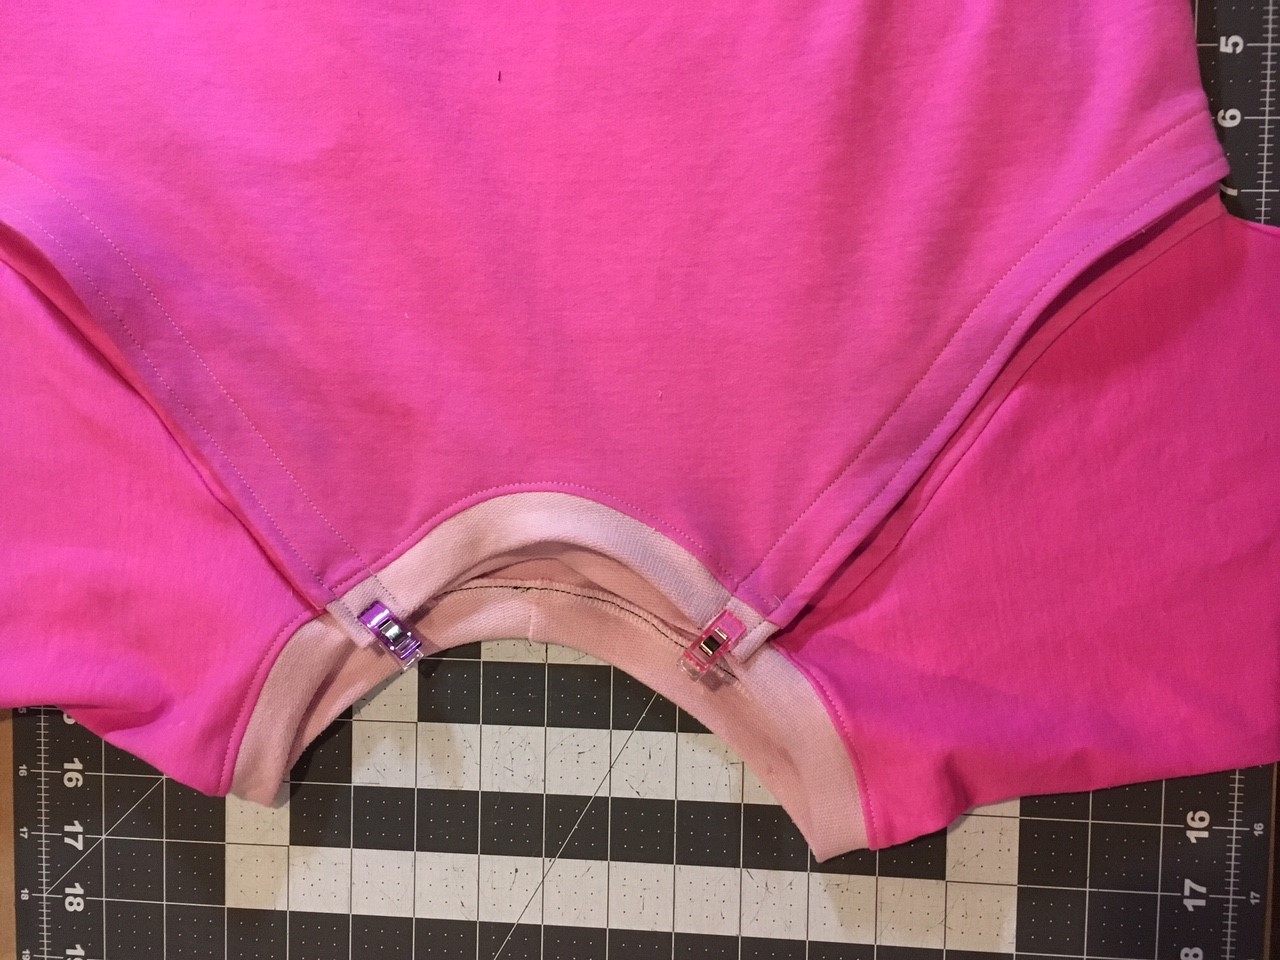
Set this piece aside and sew the sleeves to the half front and full back
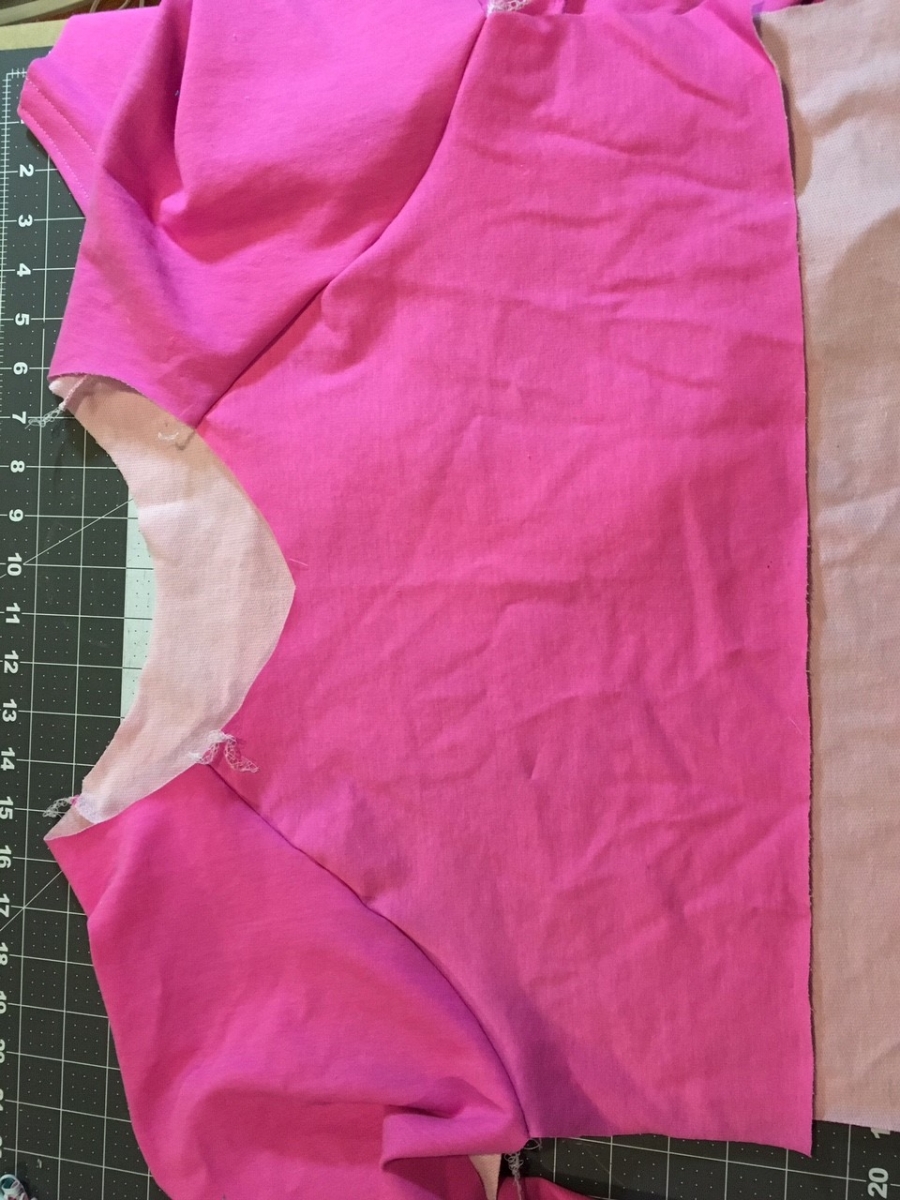
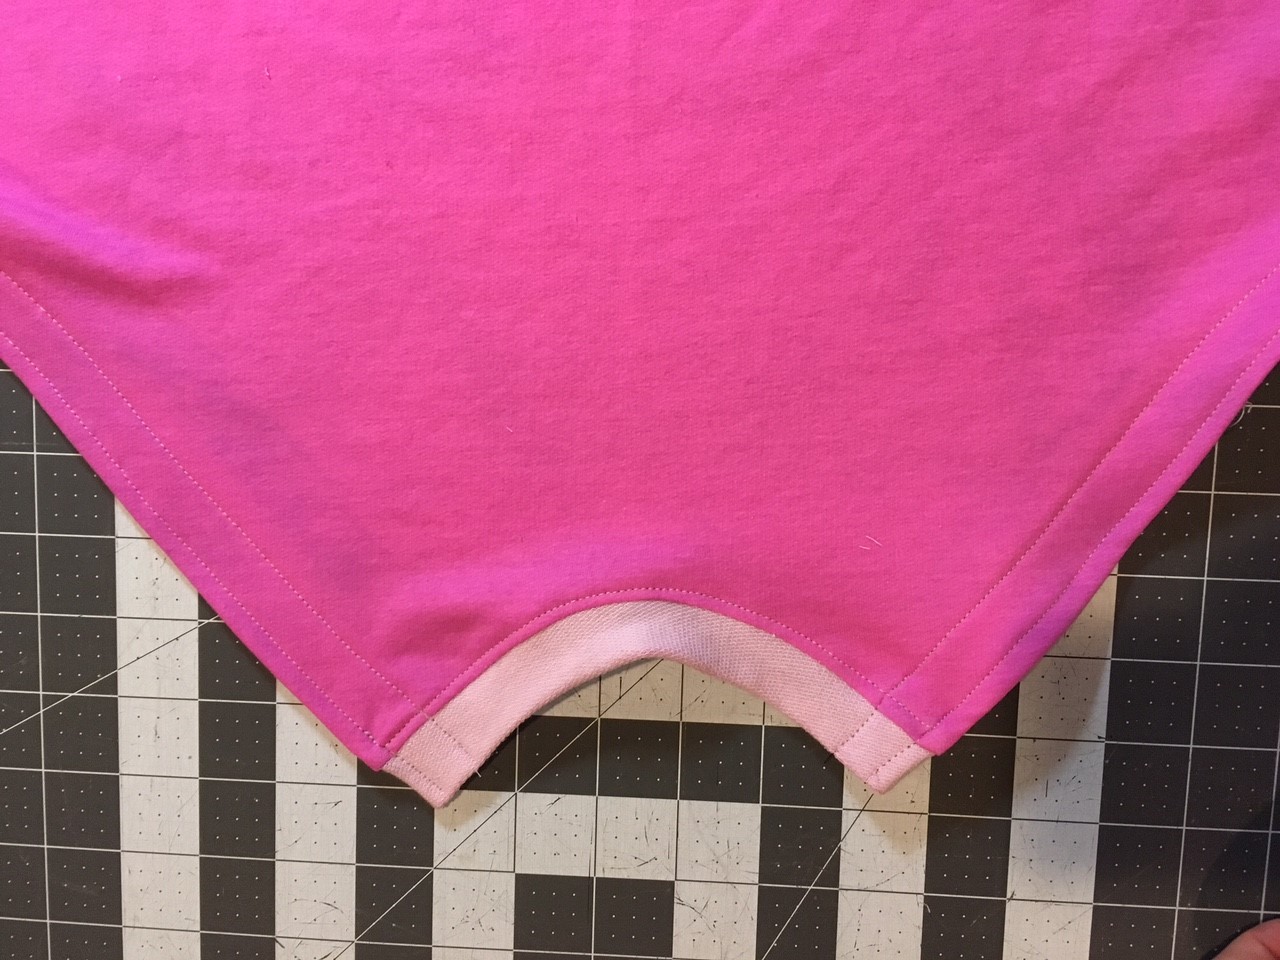
Arrange pieces to sew sleeves to bottom of hem: Half front, full front (both facing the same way) – leave ¼ inch or so between the sleeve seam and the full front—and back will be RST, creating a sandwich.
Sew from sleeve to hem and turn right side out.
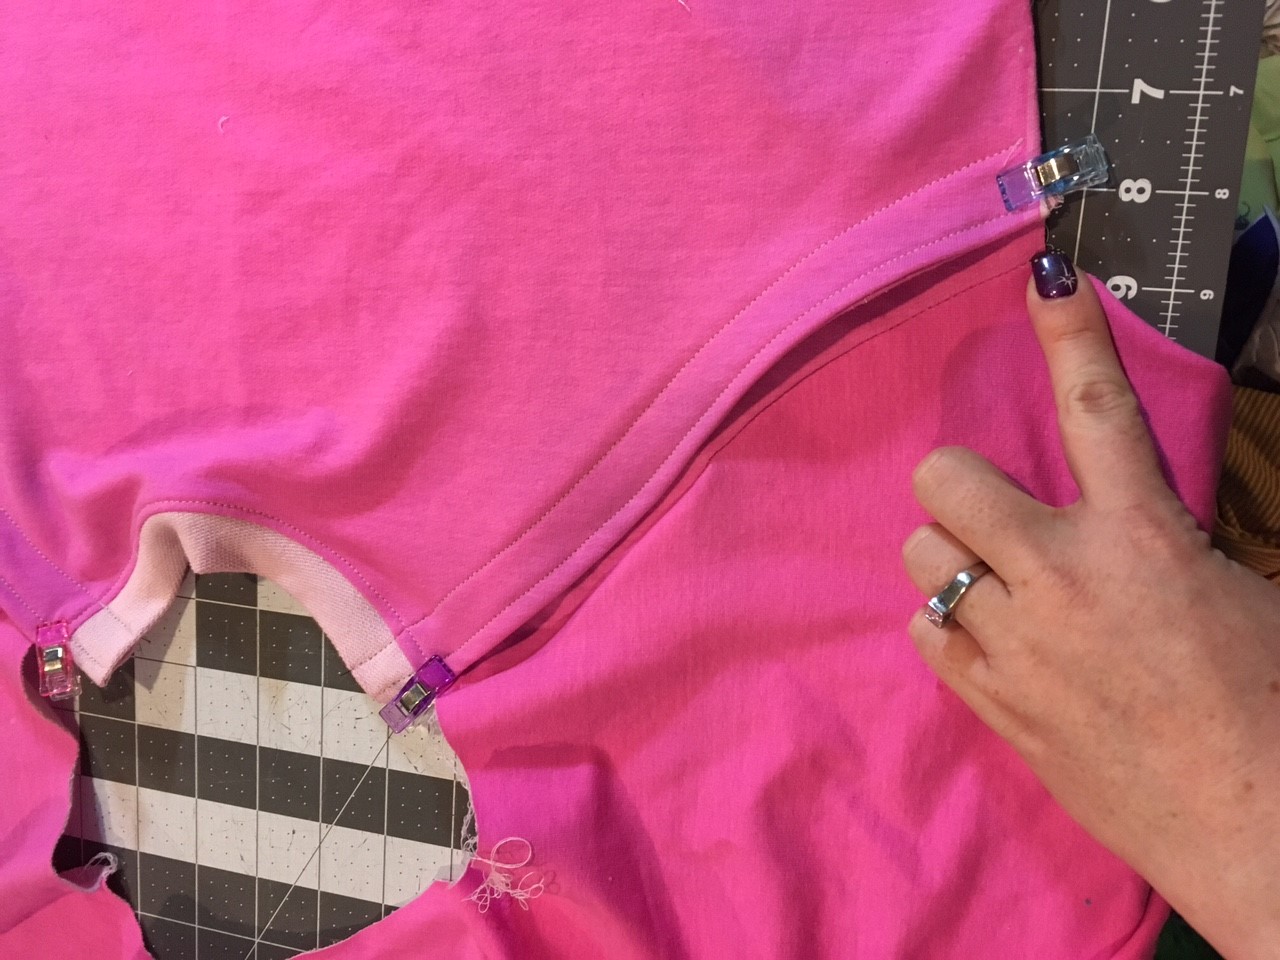
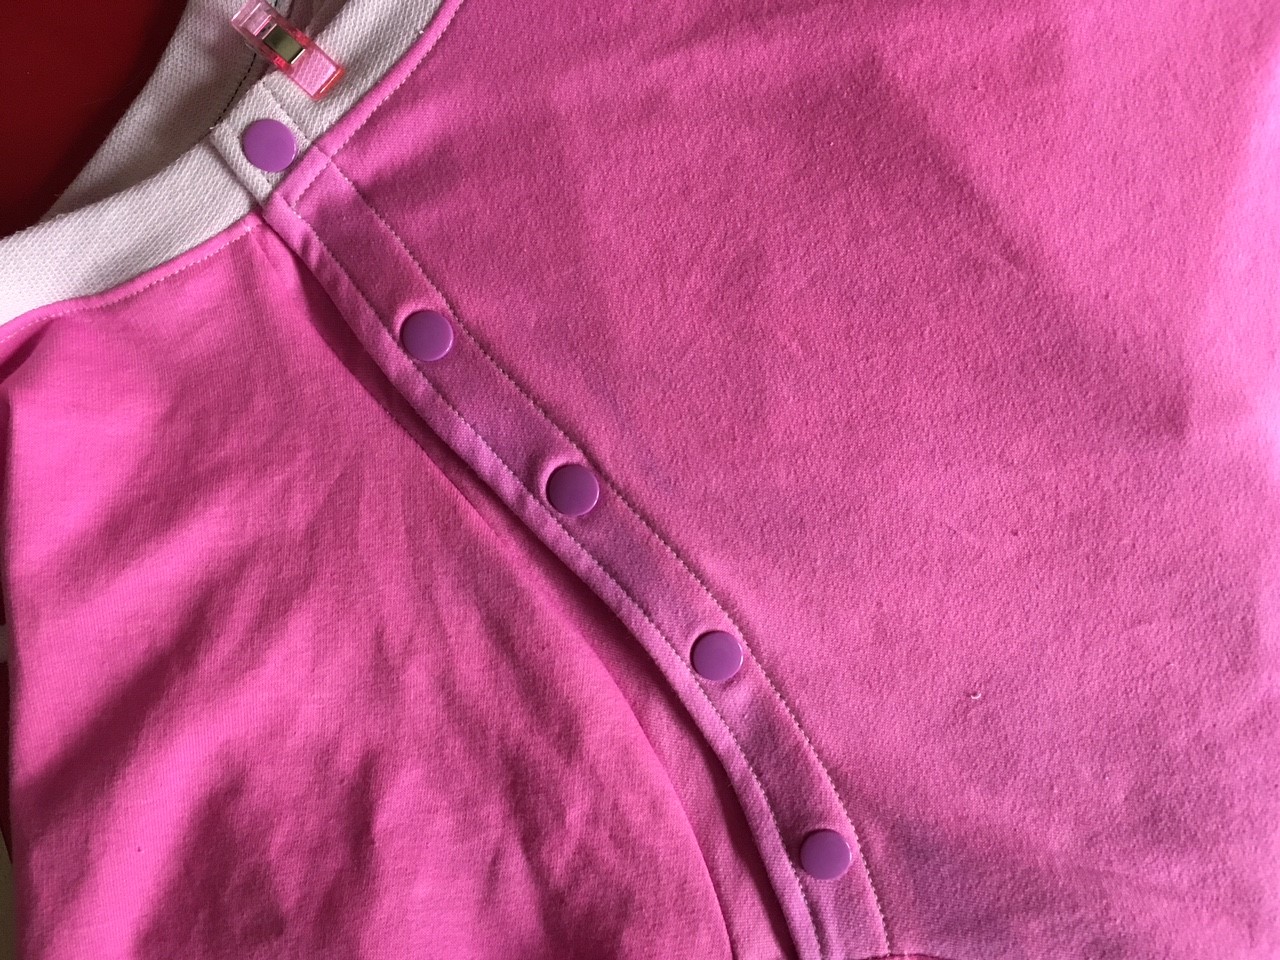
Calculate your neck biding according to your pattern directions and sew to the neckline. Topstitch and line up top flap to your neckline with that ¼ inch allowance and set your snaps in place.—Some fabrics will need reinforcement of some sort, you can add a strip of bias tape or twill tape or some sort of stabilizer on the wrong side of the fabric where snaps will be applied.
I start my snaps at the neckline and the armpit and work my way to the middle. You do you!
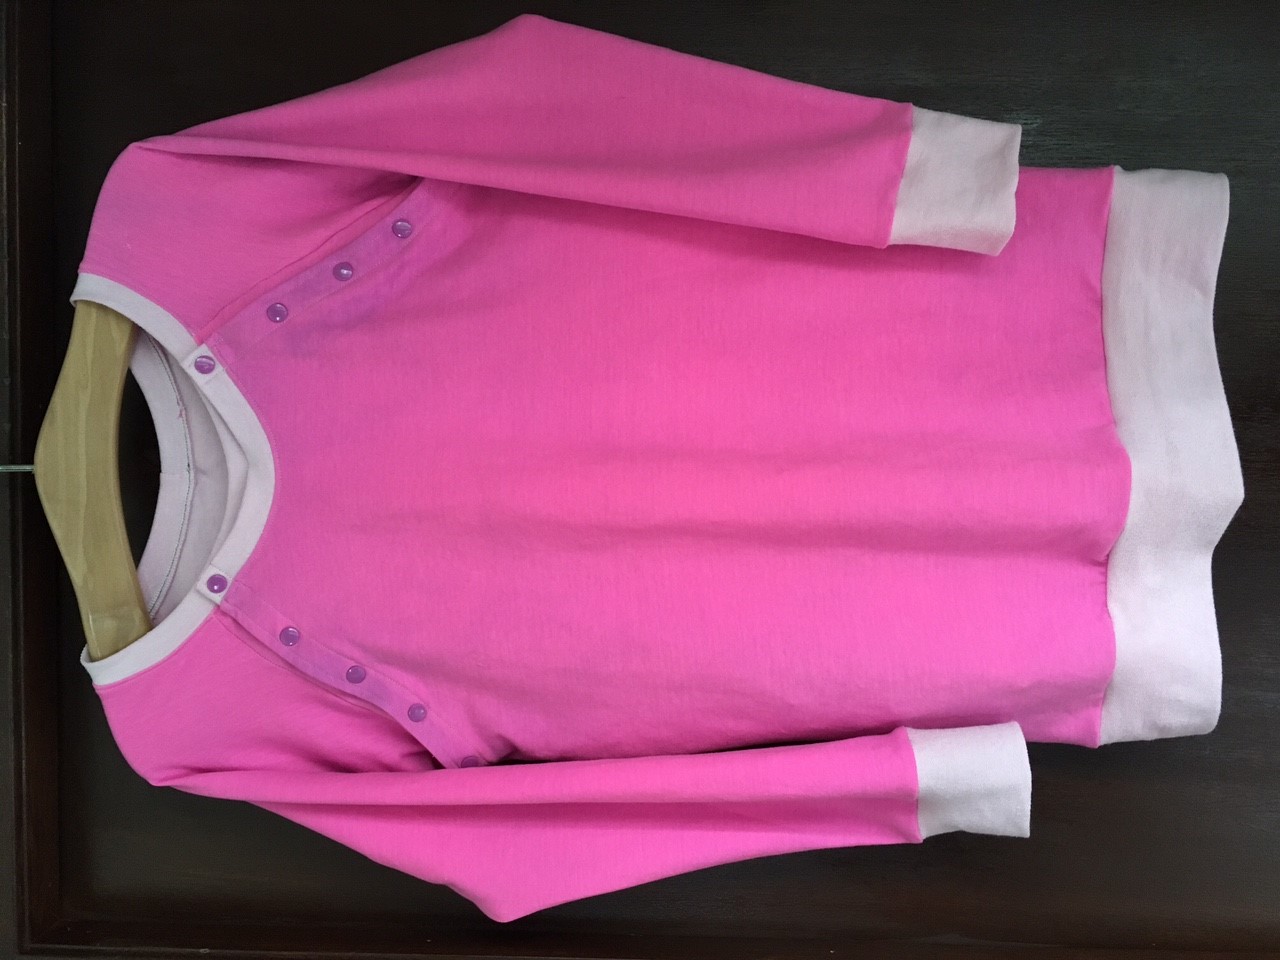
Now your shirt is finished! Wear with pride, you did it!

If you have an idea for a guest blog post, contact me via my facebook group (https://www.facebook.com/duckbuttdesigns/?fref=ts) If we decide to publish it, you get a free pattern! Comment here if there's something you'd love to see featured on our blog!