Tension - not just in your shoulders: tips for balancing your serger threads.
One of the marks of a professional seam is a perfectly balanced stitch.
When you are working with a sewing machine, there is really only one tension you have to worry about: the top thread (although some machines allow the user to adjust bobbin tension as well). Sergers, however, are a different story. With up to three wo needle threads and up to two looper threads, many first time users throw up their hands in frustration. How does one make sure that each of the upwards of five threads works together to make the perfectly balanced stitch?
What even IS a balanced stitch?
For simple straight stitches on a sewing machine, a balanced stitch means that you cannot see the top thread on the bottom, nor the bottom thread on the top. Ideally, the two should meet in the middle layer of the seam, hidden from eyes. On a serger, balance looks a lot different. The top and bottom loopers should overlap right at the raw edge of the seam. The needle stitches should hold the loopers stitches in place, but unlike a sewing machine, the needle threads are visible on both the top and bottom. When the needle threads are in balance with the looper threads, the stitches shoudl look tight. The the loops should be tight against the leftmost needle, the rightmost needle should hold the loopers down against the fabric. Getting that balance can be tricky, but practice makes it easier.
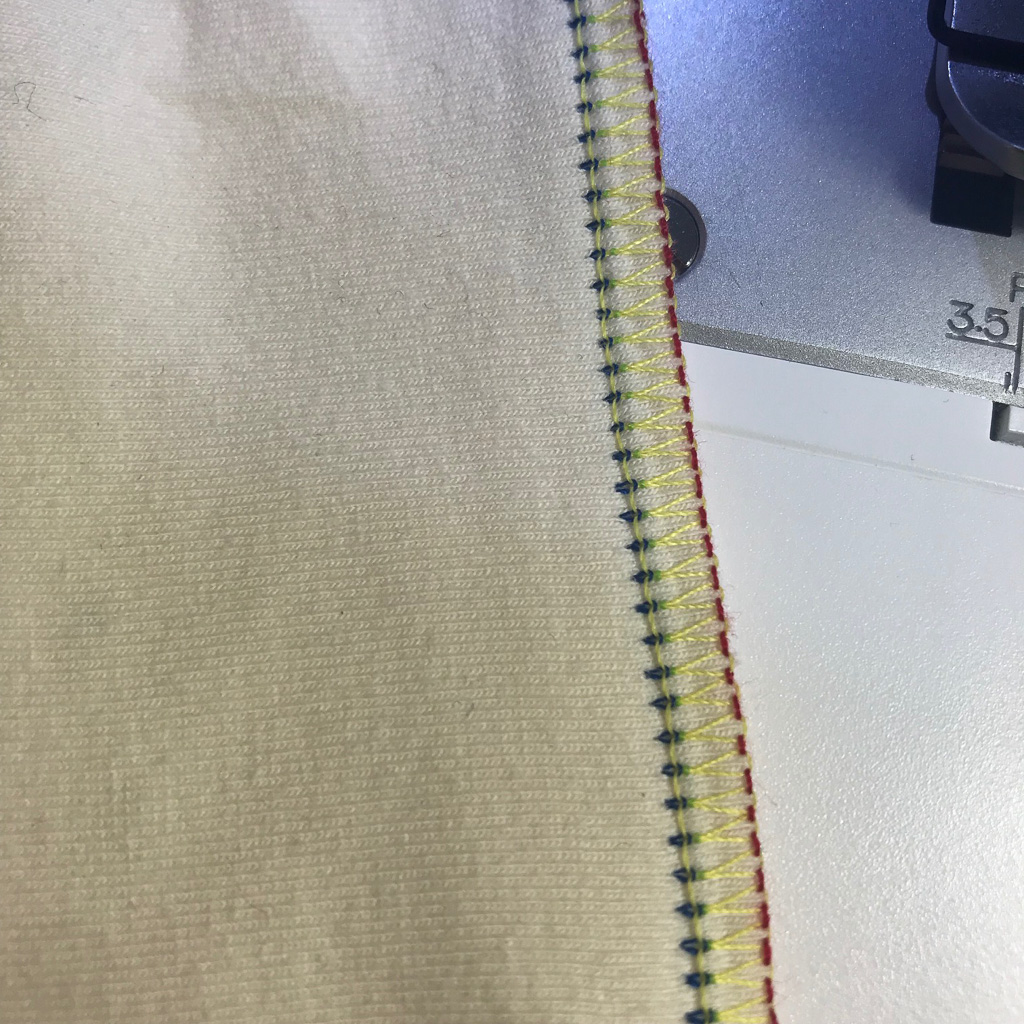
The first tip I always recommend for familiarizing yourself with serger tensions is to color code your threads. Many sergers have their tension dials in different colors. If they don't, write yourself a key assigning each a color thread. This way, when you start to troubleshoot, you will immediately be able to recognize which thread tension is the problem. For my machine, the threads are as follows: left needle thread blue , right needle green , top looper yellow , bottom looper red .
Second tip, thread your machine with the tension discs all set to zero. It will be very messy.... (I have labeled the pieces for ease of identification: f for front, b for back),
.jpg)
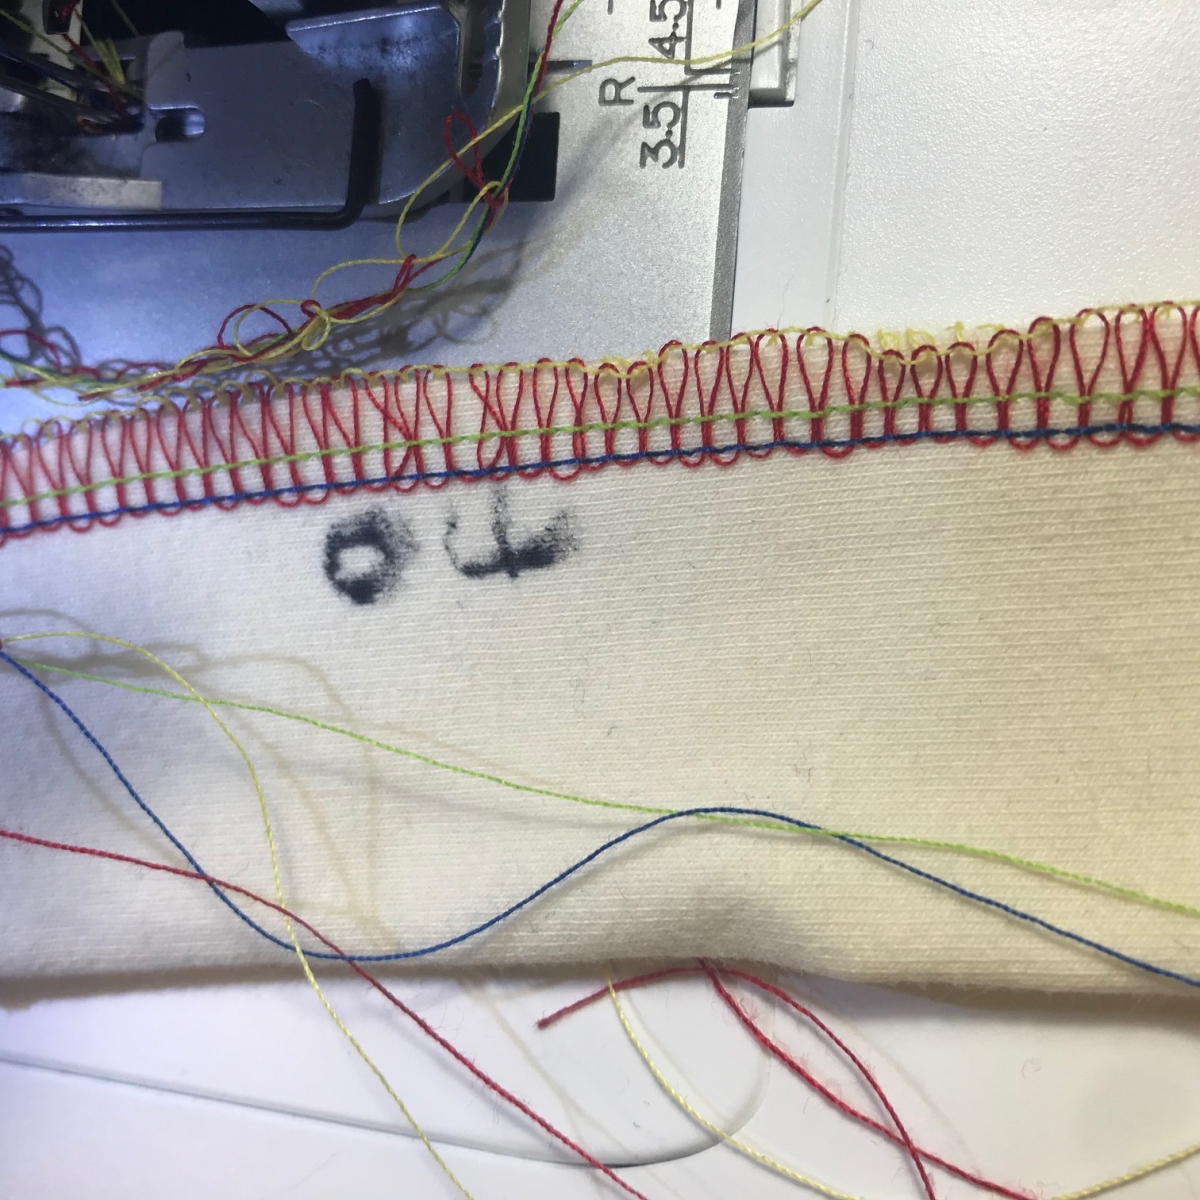
yuck.
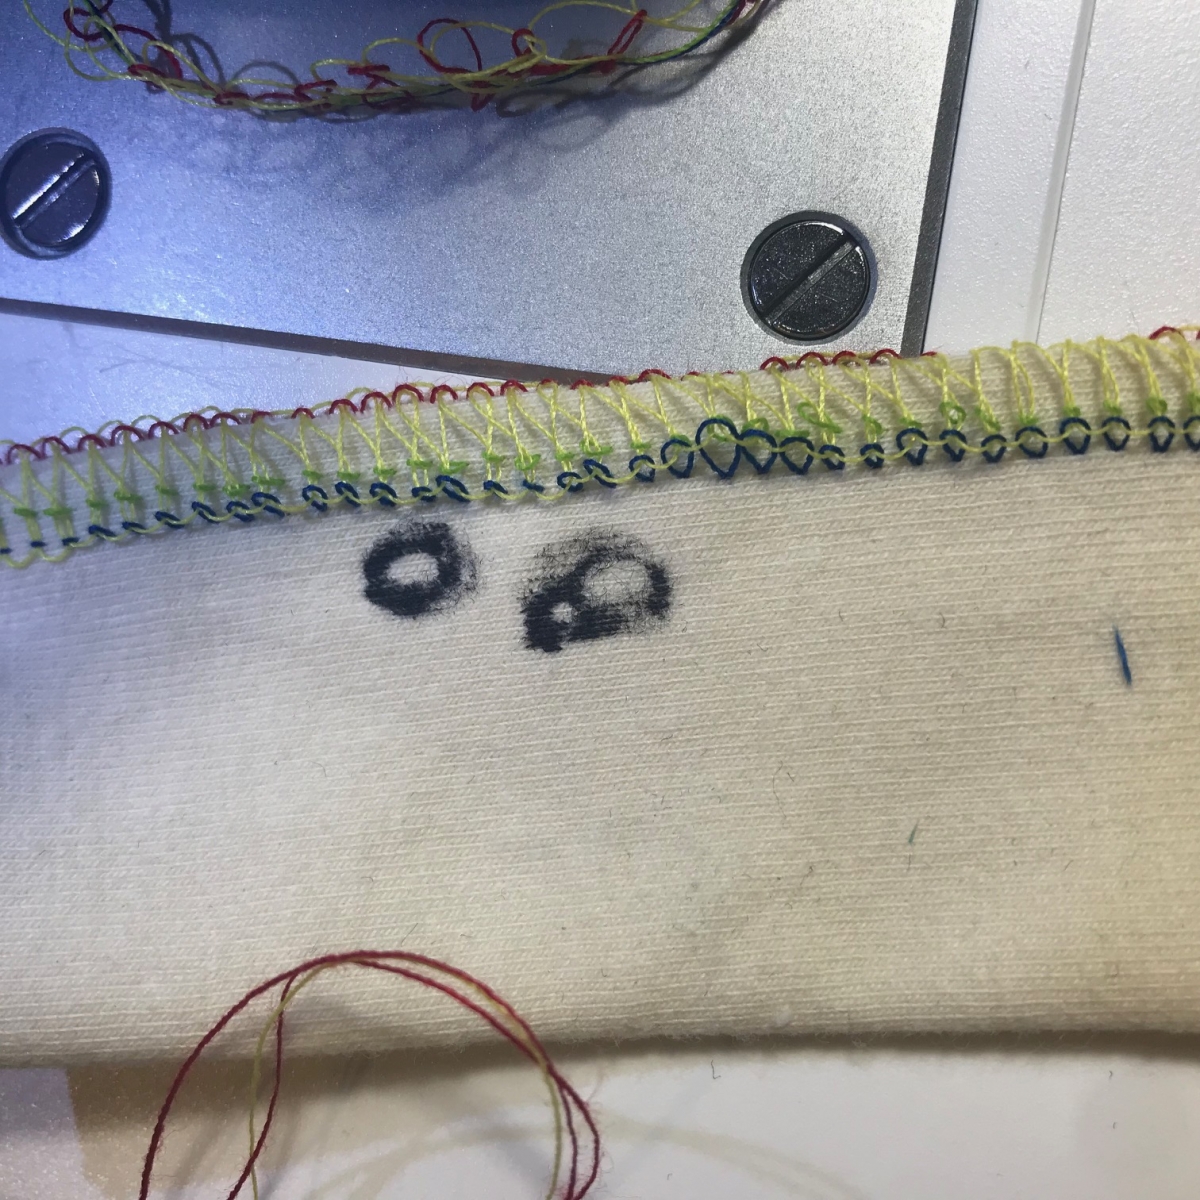
Next, set your tensions. I like to start with all threes - No particular reason, just seems like a nice starting place.
Clearly not tight enough. Notice how the loopers meet at the edge of the seam: they're balanced, but not tight enough. The needle threads are also so loose they aren't holding the loopers down.
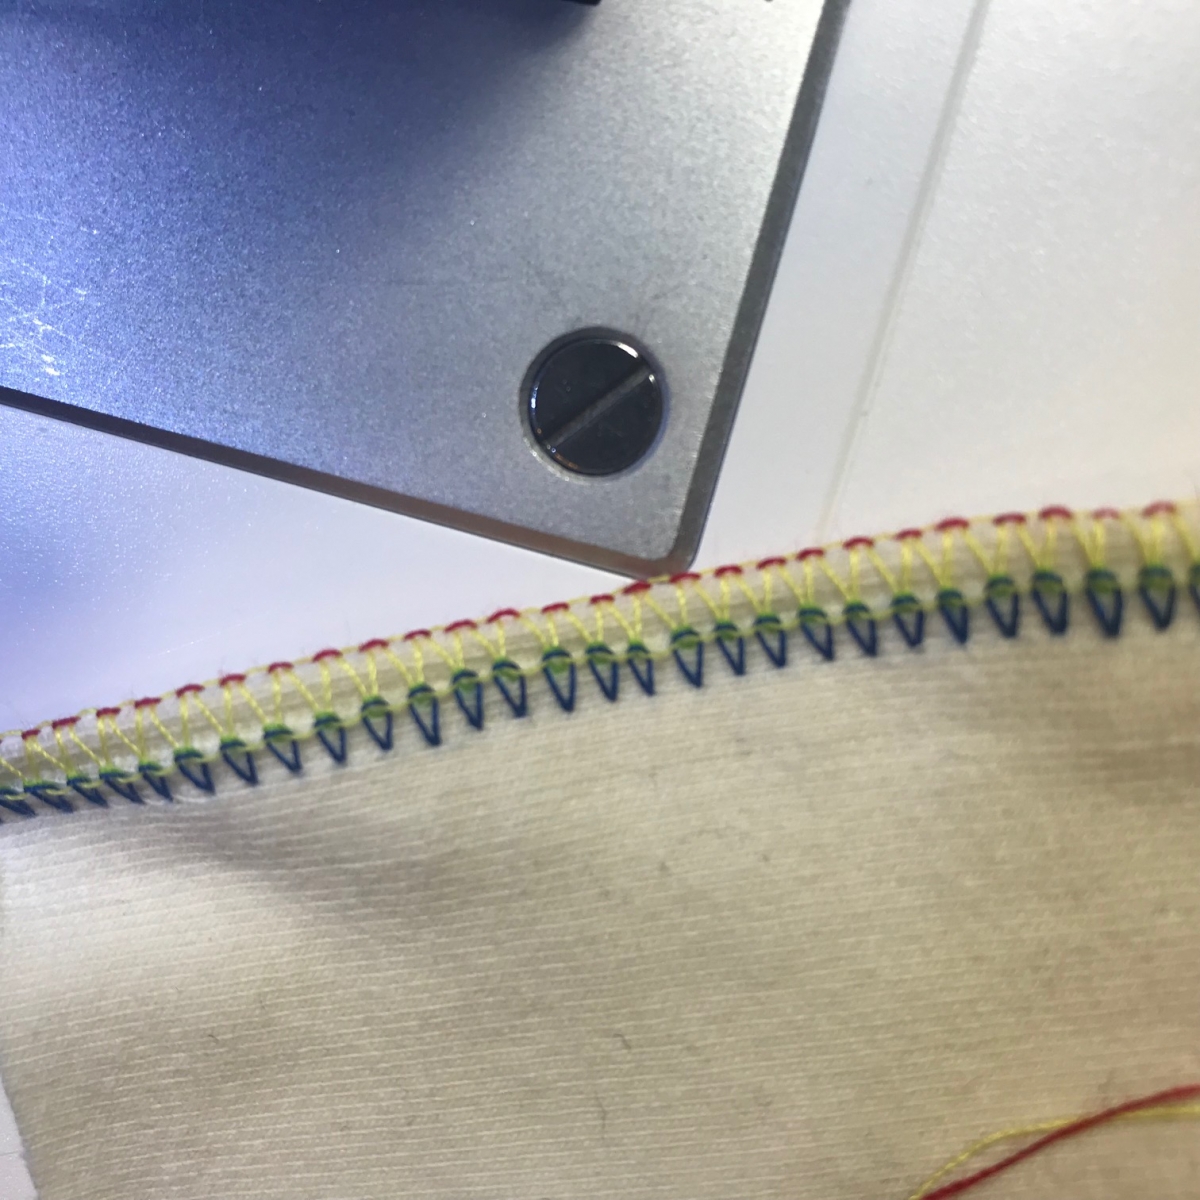
Next tip, don't adjust everything at once. Let's start with the needle threads and push them up to 4.
The needles look good. Tight, holding the bottom loopers down, but the bottom looper is pulling the which are pulling the top looper. Let's tighten the loopers to see what happens.
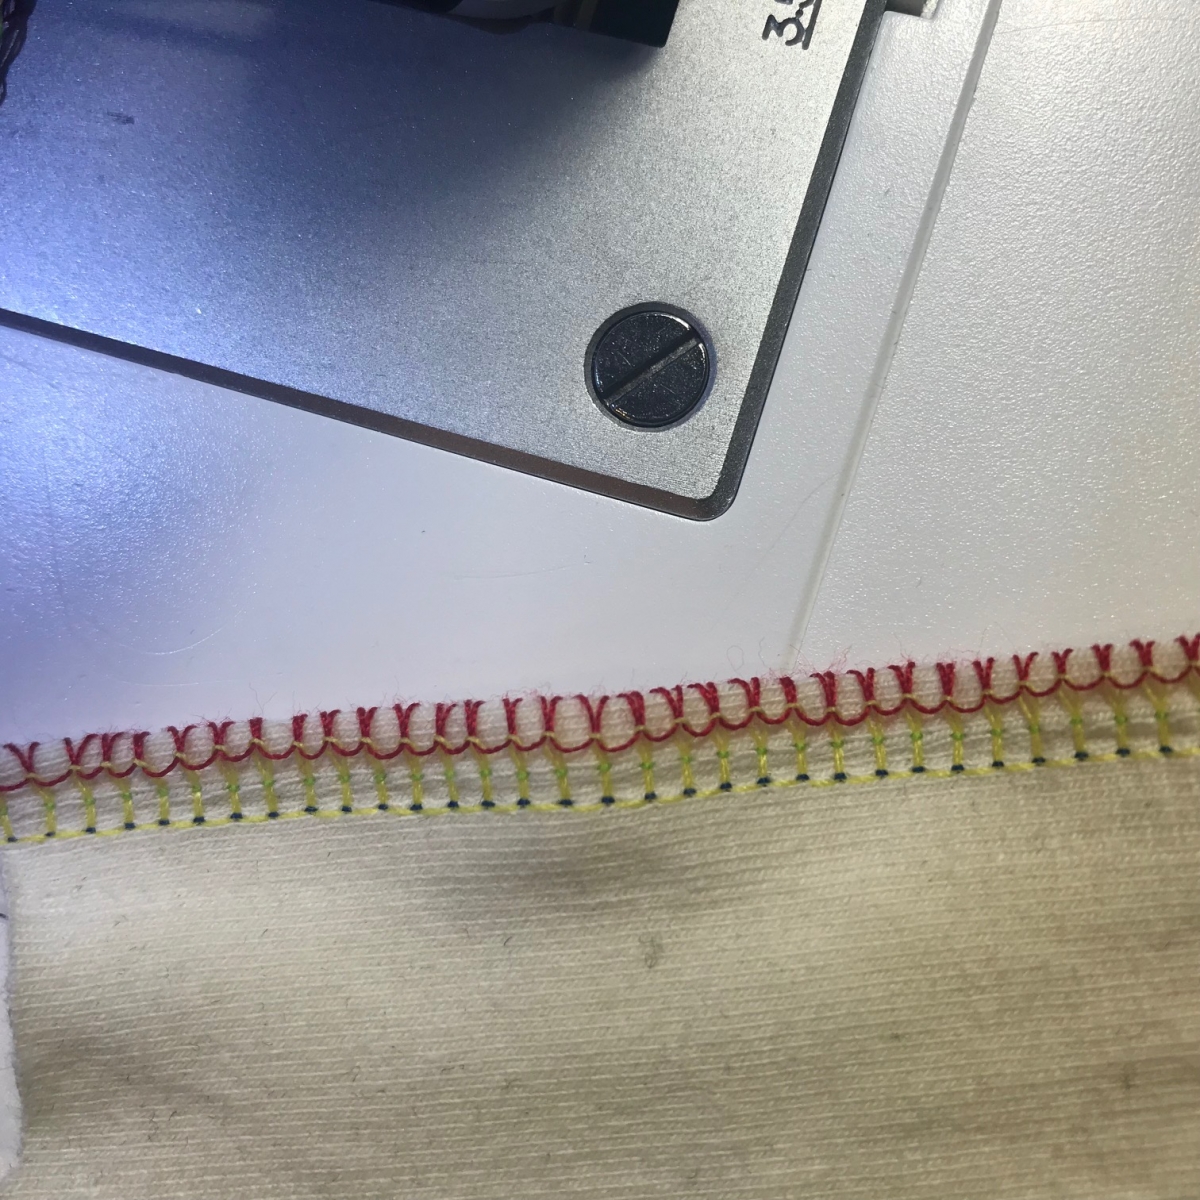
Next, I turn the looper tension up to 7.
Yikes. The loopers are in blance but the bottom looper is pulling too hard at my left needle and pulling it out. From here, I could either tighten the left thread OR loosen my top looper. Since I liked where the needles were with the 4, I'm going to lower the top looper to 6.
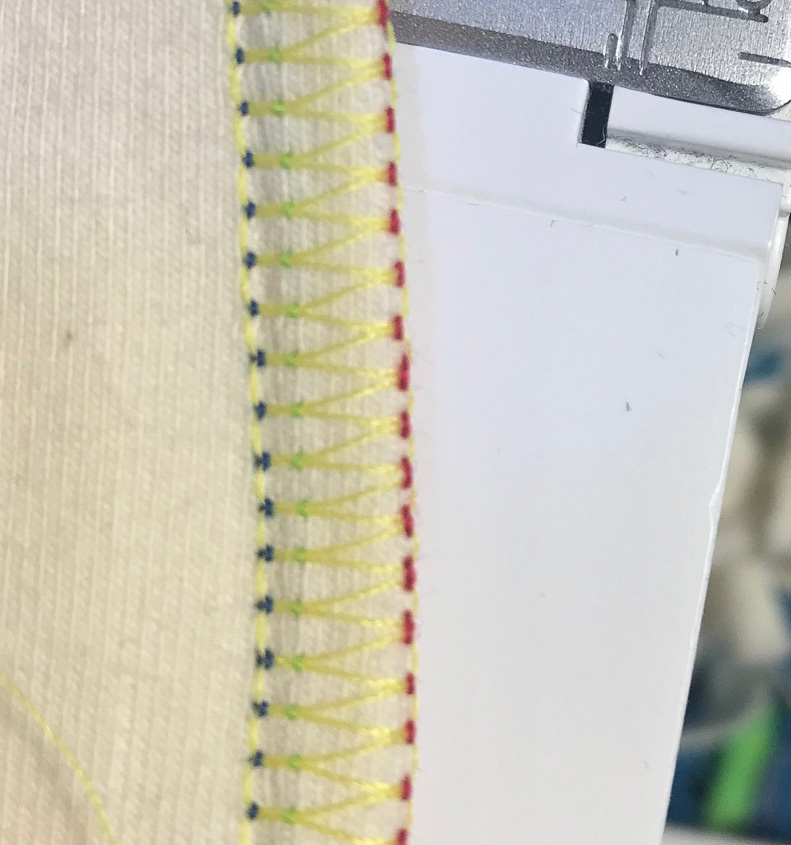
YES! Thats it. Loopers are tight against the edge of the fabric, no extra thread hanging off. The needle threads are tight, holding the bottom loopers against them.
It may take more than four steps to get it right, but remember: small increments, one disc at a time.
My final settings:
.jpg)
When you troubleshoot yours, DON'T worry if your settings are different. I ALWAYS balance my serger threads before any project because I will adjust based on the type of thread, thickness or layers of fabric, whatever I think will act differently.
Always test on the same fabric you will be using so that you know the threads will behave the same.
IF you change the tensions and see no difference, make sure that your threads are well inside the tension discs; pretend the thread is floss and move it up and down to get it between the discs. If they still aren't working, take the threads out, clean the discs with a piece of paper or a dollar bill, and rethread.
We will talk more about troubleshooting serger stitches in a separate post.
Until then, Happy Sewing!